Projekti: Twitterin tunnedatan analysointi
Johdanto
Netissä on todella paljon avointa dataa, jota on mahdollista ladata esimerkiksi Arduino-projektia varten. Arduinolla voi esimerkiksi visualisoida tätä dataa jollakin hauskalla tavalla.
Tässä projektissa otetaan käyttöön alla olevan linkin kautta ladattava data, jossa luokitellaan Twitterissä juilkaistavia tweettejä sen mukaan, mitä tunnetta ne edustavat. Data päivittyy jatkuvasti.
Projektissa käytetään Node MCU:ta. jolla pääsee langattomasti nettiin. Jos Node MCU ei ole sinulle vielä tuttu, tee ensin Internet Of Things-teeman harjoitus Etäohjattu valonkatkaisija.
Sinun on mahdollista rakentaa 180-asteen servomoottorista viisari, joka kääntyy sen mukaan, mikä osuus twiiteistä voidaan luokitella vihaisiksi. Toinen vaihtoehto on esimerkiksi rakentaa lamppu, joka reagoi Twitterin tunnedatan muutoksiin näyttämällä erivärisiä valoja!
Tarvikkeet
| Osa | Kuva | Kuvaus |
|---|---|---|
| Node MCU | 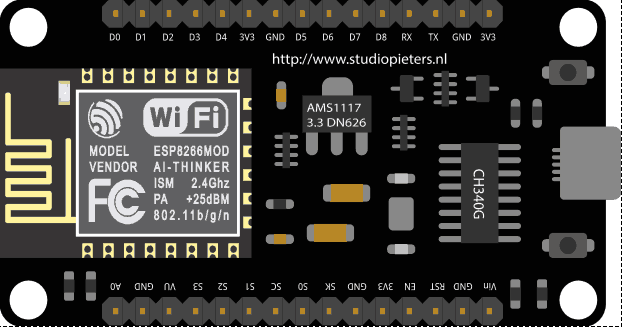 | Mikrokontrolleri, jolla pääsee langattomaan verkkoon. |
| USB-Micro USB -johto | Tietokoneella kirjoitettu ohjelma lähetetään Node MCU:lle USB-johdolla, jonka toisessa päässä on MIcro USB -liitin | |
| Koekytkentälevy | 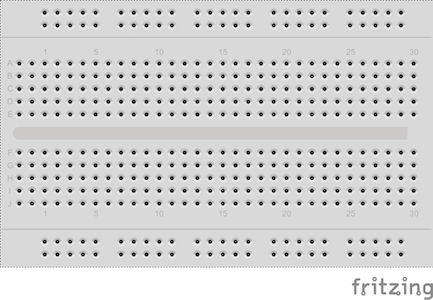 | |
| Kytkentäjohtoja | 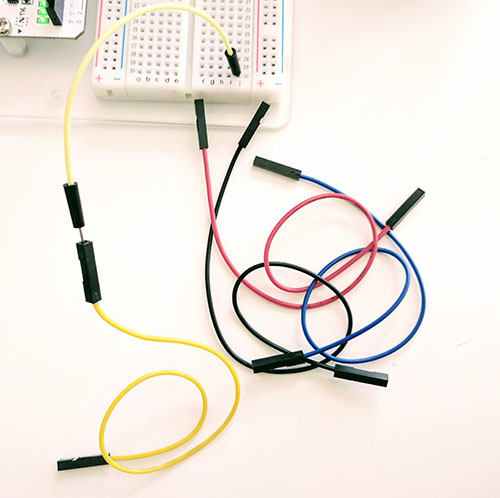 | Kytkentöjen tekemiseen koekytkentälevyn kautta. |
| 180-asteen servo-moottori | 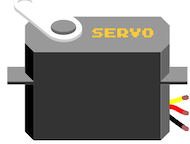 | Ottaa asennon välillä 0-180 astetta riippuen syötetystä arvosta. Servossa on kolme johdinta, jotka kytketään piikkiriman avulla digitaaliseen porttiin, 5 voltin jännitteeseen ja maahan. Huom: Maker Kitin servo on väriltään sininen! |
| Piikkirima |  | Voit taittaa piikkirimasta kolmen piikin palasen irti ja liittää sen servon johtimien päähän. Näin saat kiinnitettyä servon koekytkentälevyyn. HUOM! Mustaa muoviosaa voi painaa keskemmälle! |
| Teippiä, pahvia yms. | Tarvitset näitä, jos rakennat kääntyvän servon avullla tunnebarometrin. | |
| Adafruit Neopixel -ledirengas tai muita valoja | Tarvitset näitä jos haluat lopulta rakentaa Twitter-dataa hyödyntävän lampun! |
Virtapiiri
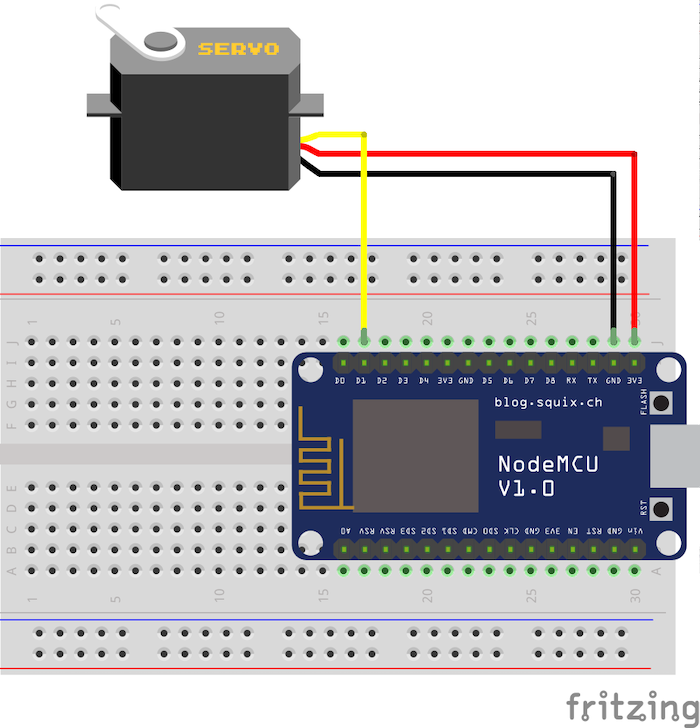
Toisin kuin Arduinossa, Node MCU:ssa ei ole valmiita koloja, joihin johdon päät voisi upottaa. Tämän sijaan boardissa on piikkimäiset pinnit, joihin kytkennät tulisi tehdä. Helpointa on painaa Node MCU:n pinnit koekytkentälevyyn!
- Paina Node MCU kiinni koekytkentälevyyn.
- Kytke servomoottori koekytkentälevyn kautta NodeMCU:hun.
- Servon signaalijohto (kuvassa keltainen) tulee pinniin D1, virtajohto (punainen) 3V3-pinniin ja maajohdin (musta) GND-pinniin.*
Mitä ensin?
Projektissa käytetään Node MCU:ta. jolla pääsee langattomasti nettiin. Jos Node MCU ei ole sinulle vielä tuttu, tee ensin Internet Of Things-teeman harjoitus Etäohjattu valonkatkaisija.
Tässä harjoituksessa kerätään dataa Twitterin avoimen APIn (Application Programming Interface). Vilkaise alla oleva video, jossa tätä yleistä kirjainlyhennettä hieman selitetään.
MuleSoft Videos: What is an API?
Mitä seuraavaksi?
Kun olet saanut Node MCU:n toimimaan, tutustu alla linkattuun tutoriaaliin, jossa opastetaan tekemään Twitterin tunnetilaa ilmaiseva lamppu Adafruit Neopixel -renkaan avulla.
Tutoriaalin kohdassa 4. sinut ohjeistetaan kopioimaan projekti alla olevasta linkistä. Lataa koko paketti vihreästä painikkeesta Clone or download -> Download zip. Pura paketti zip-ohjelmalla.
Linkin takana on itse asiassa kaksi eri projektia: WaveMoodlight ja Mushroom Light. Avaa Arduino IDE:ssä esimerkiksi WaveMoodlight.
Lataa tarvittavat kirjastot Arduino IDE:en (Sketch > Include Library > Manage Libraries). Jos kirjastoa ei löydy hakemistosta, täytyy sinun ladata se ensin netistä ja siirtää sitten Arduinon Libraries kansioon. Tarvittavat kirjastot löydät koodin yläosasta #include -komentojen perästä.
Aseta oman tai koulusi wifin nimi ja salasana koodin kohtiin ssid ja password (rivit 12 ja 13), jotta Node MCU pääsee nettiin.
Syötä koodi Node MCU:lle. Tämä voi kestää hetken. Avaa Serial Monitor Arduino IDE:stä. Sinne pitäisi alkaa ilmestymään tietoa Twitterin tunnedatasta. Jos Serial Monitoriin ei ilmesty mitään, varmista, että Serial Monitorin valikossa näkyy oikea nopeus (115200 baudia).
Huomaa, että sinun ei tarvitse kytkeä vielä Node MCU:hun mitään! Voit silti katsella Serial Monitorista boardin rekisteröimää Twitter-dataa.
Kytke Node MCU:hun servomoottori tai esimerkiksi koodissa mainittu Neopixel-ledirengas, jos sellainen on saatavilla. Pohdi, miten voisit saada servon tai valot visualisoimaan twitter-dataa kiinnostavalla tavalla. Tämä vaatii koodiin tutustumista ja kokeilemista!