Ohjelmointipolkujen lisamateriaalia

Kuvataide ja ohjelmointi

Tämä kuvataiteen polku on ponnistanut perinteestä, jossa risteävät monet virtaukset: Creative coding, Computer art, New Media ArtDemoscene...

Processing on vain yksi monista visuaaliseen itseilmaisuun suunnitelluista työkaluista ja kannattaa muistaa, että yhden ohjelmointikielen ulkoa opettelua tärkeämpää on hallita yleistä ohjelmointilogiikkaa ja ymmärtää sitä kautta ohjelmoinnin mahdollisuuksia visuaalisessa ja taiteellisessa ilmaisussa.

Alle on tehty listaa muista resursseista ja työkaluista, joista voi olla apua kuvataiteen ohjelmoinnin jatkopolulla!

PS. Visuaalinen ohjelmointi (visual programming) ei ole fiksu googlaustermi tässä yhteydessä, koska sillä viitataan yleensä taiteen ohjelmoinnin sijaan ohjelmointikieliin, joissa ohjelmointi tapahtuu liikuttelemalla valmiita visuaalisia palikoita (esim. Scratch). 

Opettajien omat ideat, Suomessa ja muualla?

Voisi ehkä sanoa, että arvokkainta lisämateriaalia ovat teknisten työkalujen sijaan muiden opettajien ja kouluyhteisön uniikit ideat. Parhaiten ideoita saa tietysti avaamalla keskustelun itse! Jaa kurssilla tekemäsi kuvataiteen ohjelmoinnin työ tai opetuskokeilusi tuotoksia esimerkiksi oppiaineesi Facebook-ryhmässä ja pyydä myös muita jakamaan kokemuksiaan!

Mehackitin muut materiaalit

Avoin englanninkielinen Processing-tutoriaali.

Kurssialustalla sijaitseva Kuvataide ja ohjelmointi Processingilla on suunniteltu lukion valinnaiseksi kurssimateriaaliksi, mutta se soveltuu pääosin myös yläkouluun. 

Englanninkielinen Art Programming Basics sisältää neljä lukua videopohjaista materiaalia. Tutustu myös projektimoduuleihin

Processing Foundation

Processingin omat kotisivut sisältävät dokumentoinnin ohjelmointikomennoista, koodiesimerkkejä sekä dokumentoituja taideteoksia, joissa Processing on näytellyt jonkinlaista osaa.

Processingia kehittävää Processing Foundationia kannattaa seurata Facebookissa ja Twitterissä.

Open Processing

Open Processing on laaja galleria Processing-töistä. Sieltä voi esimerkiksi opettajana etsiä ideoita harjoituksiin. Opiskelijoitakin voi rohkaista käyttämään Open Processingia inspiraation etsimiseen ja omien töiden jakamiseen. Kannattaa muistaa, että koodin kopiointi voi olla lunttaamisen sijaan myös mahdollisuus oppimiselle! Open Processingia voi käyttää myös pääasiallisena koodausympäristönä, jos Processing IDEä ei ole mahdollista koulun koneille asentaa. Haasteita voi lähinnä olla kuvien, liitetiedostojen ja kirjastojen lisäämisen kanssa.

https://www.openprocessing.org/

Jos intoa riittää, voi liittyä myös Facebookissa ryhmään Teaching with Open Processing

Daniel Shiffman

Processingia kehittänyt Daniel Shiffman on tehnyt Youtubeen paljon Coding Train -tutoriaaleja, minkä vuoksi hän on kirjoittanut myös oppimateriaaleissakin mainitun Nature of Code -kirjan.

Visor 

Visor työkalun avulla voit livekoodata Processingia, eli päivittää ohjelmaan muutoksia ilman, että suljet ja käynnistät sen uudelleen.

http://www.visor.live/

Tramontana

Tramontana on kirjasto, jolla Processingin saa toimimaan yksiin oman mobiililaitteen kanssa. Mehackitilaiset suosittelevat! Työohjeitakin tehdään kun vain ehditään!

openFrameworks

openFrameworks-kielessä ohjelmoidaan taidetta C++ -kielellä. Ladattavissa ilmaiseksi.

https://openframeworks.cc/


Kulttuuriaineistoja

Kuten luvun 4 runogeneraattoriharjoituksessa kävi ilmi, avoimet kulttuuriaineistot ovat mahtavaa materiaalia luovalle koodarille! 

  • Europeana on eurooppalaisten kulttuuriaineistojen katalogi. Hyvin runsaasti avointa, jännää materiaalia (tsekkaa silti käyttöoikeudet ennen kuin hyödynnät).
  • Finna: suomalaisten museoiden, gallerioiden ja kirjastojen yhteinen tietokanta, jossa on myös avoin rajapinta eli API omien sovellusten kehittelyä varten. Tsekkaa aineiston käyttöoikeudet ennen kuin alat käyttää materiaalia.
  • Helsinkikuvia: Helsingin kaupunginmuseon valokuvatietokanta - avointa kuvamateriaalia moneen lähtöön!
  • Metropolitan: amerikkalaisella Metropolitan Museum of Artilla on laaja avoimen kuvamateriaalin kokoelma, jota käytettiin Häkkää ja jaa -viikon Processing-tehtävässä.

Projektiomäppäys eli projection mapping

Projektiomäppäys on kaamea sana, mutta sen suomentaminen tuottaa päänvaivaa. Reaaliaikaisen kuvan asemointi? Projektiomäppäyksellä tarkoitetaan projektorilta heijastettavan kuvan asettelua mille tahansa pinnalle, mihin tahansa muotoon. Samalta projektorilta voi jopa heijastaa useampia kuva-alueita, joista jokainen säädetään heijastuspinnan muotoihin sopivaksi. Processing-ohjelmoinnin ja projektiomäppäyksen yhdistäminen on myös mahdollista! Mehackit ei vain ole ehtinyt vielä tuottaa aiheesta tutoriaaleja.

  • Tutustu aiheeseen esim. sivustolla Projection Mapping Central
  • Ilmainen työkalu jolla pääsee alkuun: VPT
  • Krisjanis Rijnieks on kehittänyt Raspberry Pi:llä toimivan projektiomäppäyssovelluksen nimeltä ofxPiMapper

Janne Aholan projektiomäppäystä hyödyntävä teos Ajan rooli:


Musiikki ja ohjelmointi

Mehackitin muut materiaalit

Kertaamiseen ja taitojen syventämiseen sopii hyvin Mehackitin avoin Sonic Pi -sivusto. Olemme ylpeitä tästä tutoriaalista, jota kelpaa vinkata kansainvälisille kavereillekin: sivusto on käännetty mm. japaniksi, kiinaksi, norjaksi, ruotsiksi, espanjaksi, ranskaksi, koreaksi, katalaaniksi sekä pohjoissaameksi!

Englanninkielinen Music Programming Basics on Mehackitin tekemä videopohjainen neljän oppitunnin kokonaisuus. Sopii erinomaisesti myös vasta-alkajille!

Sonic Pi:stä muualla

Sonic Pi:n ympärille on jo muodostunut innostunut ja avulias yhteisö opettajia, taiteilijoita, kokeilijoita ja keksijöitä. in_thread on foorumi, jossa yhteisö jakaa ideoitaan ja tuotoksiaan. Täältä löytyy esimerkiksi tuntisuunnitelmia ja opettajien kertomuksia Sonic Pi:n käytöstä luokkahuoneessa.

Sonic Pi:n kehittäjä Sam Aaron on kirjoittanut kirjan Sonic Pi:n mahdollisuuksista. Vaikka kirjan kohteena on erityisesti Sonic Pi:n käyttö Raspberry Pi:n kanssa, ohjelman toiminta on sama käyttöjärjestelmästä huolimatta. Kirja on erityisen hyvä lähestymistapa livekoodaukselle. 

Sonic Pi:n subreddit

Muita työkaluja ja avoimia ääniarkistoja

  • Kurssilla vinkattiin, että Audacity on ilmainen, open source -ohjelma äänen käsittelyyn ja esimerkiksi Sonic Pi:stä nauhoitettujen biisien leikkaamiseen
  • Freesound: Suuri ja suosittu CC-lisensoitujen samplejen kokoelma. Mukana myös Yle Arkiston jakamia ääniefektejä!
  • BBC:n 16 000 ääniefektin kokoelma on vapaasti käytettävissä opetukseen
  • Sounds of Changes: Kuuden eurooppalaisen museon projekti, joka tuo kuuluville ja käytettäväksi ääntä eri vuosikymmeniltä.
  • Sound Jay esiteltiin viikolla 3: sampleja ilman kirjautumista
  • Audio Online Convert: Käytä tätä esim. mp3-tiedostojen muuntamiseen Sonic Pi:n ymmärtämään muotoon
  • Avoimen lähdekoodin projekti BeepBox on hauska ja ilmainen tapa luonnostella ja jakaa musiikkia. Samalla tulee tutuksi sekvensserin idea. BeepBoxista voi ladata koneelle myös offline-version.
  • Pure Data on avoimen lähdekoodin graafinen ohjelmointiympäristö, joka sopii ääntä, grafiikkaa, videota tai anturidataa hyödyntäviin - tai vaikka näitä kaikkia yhdisteleviin - projekteihin. Pure Datassa piisaa tehoja myös mutkikkaaseen käyttöön, ja sen käyttöä opetetaan mm. Aalto ARTSin Media Labissa 
  • SuperCollider on toinen avoimen lähdekoodin ohjelmointiympäristö, jota käytetään generatiivisen äänen ja musiikin tuottamiseen. Sonic Pi käyttää SuperCollideria äänen muodostamiseen.
  • Myös TidalCycles (tai lyhyesti Tidal) on avoimen lähdekoodin projekti. Se sopii erityisesti musiikin livekoodaamiseen.

Sam Aaron - Programing as a Performance

Tekstitykset

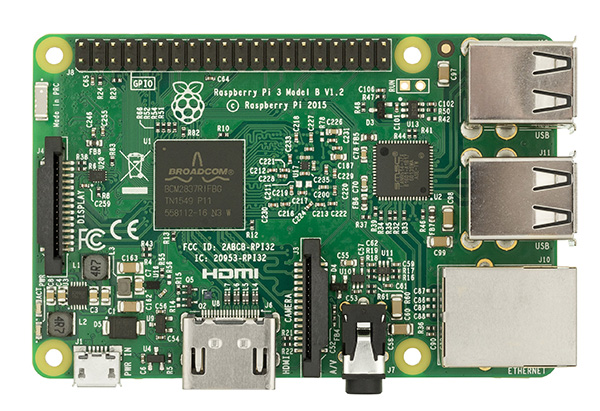
so I'm going to tell you something this is probably quite important I'm going to give you some ideas about to the future about computer science and so I need to talk to you about where computer languages are going so how many here of you here have a PhD in computer science that's gonna be tough really nobody I can't see the top maybe some grip there okay so the thing is why would you why would you care about computer science why would you care about programming you know that's it's a tough one um and I think is I deeply care about it and I'm hopefully trying to communicate to you why it's important um one of the reasons why I think it's important is to do with what you can do with it now the thing is I'm gonna show you some things you can do with programming I'm hopefully gonna convince you that it actually well how many of you actually have coded before us a better question Oh quite a few okay so some of you have an idea what it is I'm really addressing now everyone who hasn't coded because hopefully there by the end of this talk you'll go away and you will start to code because you probably have some preconception to what programming is right you think you know what it is and it's probably to do with business and we've all heard that we should teach children how to program because they'll get jobs right but since when was that a useful thing for for school children to learn how to become I do teach mathematics to get jobs in mathematics do we teach them PE to get jobs as sports people I mean it's ridiculous isn't it you know do you teach English so people become writers not really you teach these things because they're important private as tools third broader lives some people of course are going to become readers and writers are professionals but of course let's ask another question how many of you here can read all rights not everyone's put the hands up that's that's confusing how do you give your hands up keep your hands up Khan and then drop your hands if you're not a professional writer right so why have you bothered seriously why he bothered to learn like and then we know if we talk about this in programming terms why should we teach programming in the same way it's not that everyone needs to become a professional programmer that's ludicrous lots of people will nuts great but lots of people will learn to program in the same way for the same reasons you've all learned to read or write and I'm going to argue that that's because it's one of the most creative tools for expression that we have today we just yet haven't discovered it well you haven't I have and I'm hopefully go try and share with you that's that's the goal of today and so now we're really talking about education we're talking about why we should share these things and what's important about it and so when we stop talking about programming in these terms we need to then really communicate why we're doing it and and how we can do this and so one of the goals really here is to lower the barrier to entry and so I've got this this this thing I'm going to show you and it lowers the barrier to entry in three ways the first way is cost right computers are pretty expensive and so not everyone has access to a computer and certainly children they might have a have a computer at home but the parents they don't want them to touch it because it's there they don't know how it really works properly so if the kids mess around with it their emails break right so don't touch the computers they're a family computer so one way to do is to use release things here which is a Raspberry Pi if I don't heard of raspberry PI's before so they're fabulously cheap like 25 pounds right so if you break this it's not the end of the world and so if you're a child you should be able to get your parents to buy one of these for the Christmas or for birthday it's not crazy expensive so that's one of the way to learn the barrier to entry but of course if you already have a computer at home then use that it does available to you so just use a computer or if you haven't got access to one by Roger PI the second and then the other thing is software like this software here behind me this thing called sonic PI where's the information where the buttons what's going wrong with this we share some information this software is entirely entirely free so that's another way of lowering the barrier to entry is cost so cost of hardware cost of software the other way of blowing the barrier to entry is to make sure it's simple and easy to learn because that's another thing computing is a very complicated thing typically people say it doesn't to be just like reading a writing isn't isn't complicated you don't start to learn a writing learn to read or write by reading Shakespeare do you know that's would be a crazy thing to do you learn to read by saying Apple all right and so that's how you start this in the same way with this programming system I'm going to show you how to learn to program in a way that I've taught at your old kids how to do this and this software has been developed in primary schools and secondary schools with children the whole way through watching and observing them and use the software and then modifying the software to make the next generation of kids have an easier life and the cool thing about this is I've seen children do amazing things with software so I know that all you guys could do the same too and then the third way to lower the barrier to entry is to create motivation why would you bother if I say you need to learn to read or write because you can write legal documents how many of you going to do that all right it's ridiculous I mean it's obviously kind of jobs lawyer that'd be a good thing but you learn to read or write because you want to write letters to friends it's Valentine's Day so write poems to our loved ones Susannah I'm gonna write a poem they Scranton haven't got it yet but I will do and and also we can write Diaries and also the readings so there's important to be able to express the science reading writing and sing with programming we don't just want to learn to program that the typical thing I've seen I've seen lots of educational of trusts and organizations create really exciting engaging things for kids to learn to program one of them was by a big examination board in the UK and the title was give binary a try that sounds exciting to me the other one was have fun this is a good stop have fun with sorting how many of you ever had fun sorting anything in your entire lives that's ridiculous right I mean I love sorting my socks that's a good thing so we need to find ways that get to kids and get to everybody else it's not just about giving binary try having fun miss autumn you think of tools to engage them in something that's meaningful to them so they're not talking I'm going to spend the rest of time showing this piece of software which I hope souls all those things have just described so here it is if you want to tweet about it that's at sonic underscore pi is the busy accounts and it's get rid of this information now and so the way to start is to try and think of a way that's meaningful to children but it's also as simple as possible to get started so we're talked about play being an important concept so let's write the word play and then we can choose a number because programming is all about numbers isn't it no it starts choosing them below this and then oh it's very quiet it up a little bit there we are that's the first program you could possibly write in Sonic PI I'm just making a little beep and actually that may sound very simple and not very very exciting but kids go wow that's amazing a beep and so they really that are you should see them now I just light up and the cool thing about this is this is a full program we have lots of opportunities for learning opportunities for teachers to talk about what's going on here there's a full program there's functions there's abstractions abstractions it's a big word abstractions mean really things which map onto other things so you take a domain like numbers and you map it onto another domain right but you need to have some kind of way to make that mapping happen so is that this is a question asked lots of people but rarely people seem to know the answer which I'm quite confused about so maybe you lovely guys some Manchester be able to ask this question what the numbers do it's very quiet right they don't know it they go up and they can go dance come on so the cool thing where these numbers linking over now so in the domain over here what else can go up and down in music pitch exactly notes so if I choose a higher number I get a higher notes choose a lower number I get a low note right so we're done right we've got Rick we can play all the possible notes in the world although these are all whole numbers they actually map onto notes of a piano so as going up in whole numbers I'm like moving from C to C sharp to D and so here actually I can also do numbers in between numbers there's more like a violin sliding so this isn't a normal notion of piano it's in between so lots of things in just one line of code the next thing to do is to sort of make a melody you can make a note let's make a melody Sert's choose note 80 and it's play notes 85 nice nice melody here and that might be a surprise to you if you if you think what's gonna happen I thought was gonna play 80 and 85 but this system is actually not just a programming coding tool this system is a fully functional musical instrument and I really mean it in the broadest possible terms this is like a violin this is like a guitar oh really this is a new kind of instrument if I hope you'll learn to play I use this instrument to perform a night clubs as you can tell the people have a great time these beats is wicked and I'll show you in a moment actually where you can go with this but but yet so it when we talking about musical instruments actually music really and calculates one thing beautifully and that's time if all the notes happened at the same time well that will be interesting but it would limit to us where where we can go with things it would be very quick performance so you want to be able to spread things out over time so there's another important command in sonic PI which talks about time it's called sleep so gasps the computer to go to sleep for a second like this so we win a play notate T or C for a second and then we'll play note 85 this is obviously the nightclub standard quality music audience you might laugh at this but at this point I've pretty much done all of western notation think about that for a moment what is the melody it's which notes to play and when to play them right well if I got here I can play any notes I can choose any length of time between each notes I can do any melody can do any bassline I can take Mozart I can take Beethoven I can take Daft Punk I can represent it in this and children do take their favorite melodies and they reproduce them with just two commands so you can get started tonight's downloading tonight PI for free plays thick plays thick play see my six-year-old niece at the time when she was six I showed her these two commands and she could read and she could type in the keyboard that's all she needed to be able to do and she wrote hundreds of lines of this you know I was like that's great he says I'm not finished yet but you kept going right so you can do have a lot of fun with it just two commands but of course if I'm making this claim I can play this in nightclubs I need to spirit of convinced you can do a bit more and so in addition to be able to make beeps I can also make Sam play samples so I can actually play pre-recorded sounds so a really cool famous sample as the are men break they're not heard of the Amon break you all have you just robably don't know it's called it sounds a bit like this right right say well let's try and make it a bit louder let's go opportunities to talk about how you might manipulate sound so there's a drum break but but in something power you can do like and what I'm showing you in this is next six minutes it's just the tip of the iceberg really there's lots of depth and one way to demonstrate this is you can not just play a sample but you can manipulate it so let's change the rate of its playback so we're playback at a harp speed we didn't some the Matassa team was using pretty much exactly the same way by nwa with Straight Outta Compton you know it really rapping on top of this dr. Dre swearing and things the take a trigger jobs lately slipped out we actually create some sort of early old-school hip-hop sound of course they only play the normal normal rates this is the start of the draw and based things you know we've got the mash it up and play around with it and then if you want to go forward a few more years he took a little bit of Gabbar and fast dance music jungle right I've just changed a number to three different numbers and got three different genres of music that's pretty cool isn't it right and so you can take any sample manipulated in this exact way another thing that you can do is you can take another sample out this guitar sample this one yeah and these samples which are built-in they're all Creative Commons zero license nice guitar sample son was made change of rates and 0.5 so I can then think about what else do want to do so in children will ask to say if we're teaching computer science they won't really ask how to do sorting they'll say well how do I make that sound better they said well actually this is a computer science lesson you can't do that well that's the rubbish answer isn't it so you want some children will ask these questions and you want to maintain their engagements to maintain their motivation and so one way to do it is to be able to say yes you can make this sound better what do you mean by better so one thing they might say is well when I listen to this kind of music it sounds more roomy what do you mean by that's well actually if you think about this in studio terms that means more reverb so how do I have some more reverb to this well I use some computer science i I use what's called a lexical scope that's a fancy word but it's just wrapping this round with some reverb in the same way I take my guitar plug it into a reverb pedal plug that into an amplifier I can do the same to this code I just need to write with effects reverb do to say where what the reverb has start and end so I want the reverb to finish you'll see now that the sample is within the reverb so now that sample will be played with reverb and change a room size second in the same way you have guitar pedals have those knobs that can change the knobs here make it make even more reverb traffic yes it's great but also I quite like it to do a bit more echoing stuff can you do that well of course we can't sure so what we need to do a couple of these things let's do effects what is sounding more load why can you do low file into 8-bit music cool sure I can do that let's do like with effects bit crusher bits eights - can see you all I'm doing just adding and listening and adding understand listening and so this way we're this ability to play samples make beeps and of course I'm not showing you but you can do more than beeps there's about 20 different synthesizers built in each of those synthesizers is like a full synthesizer will fired a shot with about 20 to 30 different controls to manipulate so you have a huge range of sounds you can generate and with the ability to do effects you and the ability to play these things through in time with the sleep command you can do insane number of different kind of compositions with this with this tool already but to be honest that's boring right composition is so old-school where we want to be today and where light where where the electronic music is not today where it should be is live performance when I go and see it got a rock band playing I do not see them going onstage sitting on the chair like this cracking on a CD going on enjoy the CD right where's where's most electronic artists will actually just play a CD of their music or the equivalent of them maybe do a bit of tweaking because their work their virtuosity and there is a lot of virtuosity electronic music is mostly in the studios they spend huge amounts of time in the studio really polishing the sound so that when they go onstage it just sounds perfect but who wants perfection surely modernism was a long time ago seen as a ridiculous idea that everything can sort of go towards a perfect idea I want real people I want real ideas I want what risk on danger want things to go wrong and I want to see what happens when it goes wrong because that's that makes things just a tangibly lie and so with electronic music we can start to do this when we start to use code and this point you need to add something else we've got a thing called the live loop and so if I do if I call this Sally doodle I bleep need to have a name I can play like a sample and a bass drum and like this and then sleep for half a second now I've got a loop why it's already so in the club that's going but I caught at this point I can actually once it's playing I can change aspects of the sounds so change the cutoff value start to bring it up right and so all I'm doing is changing your number and you can see I'm actually performing and so are maybe Jane is gonna play she's gonna synchronize with Sally so they can play at the same time another sample let's play loop not the arm in break industry let's beat stretch that to one beats so this point I'm starting to make a dash home track and I'm thinking how do I make them take the melody to this well since I've only got like one minute left so I'm gonna just skip straight to the point it's like pi will you download it at home which you all will tonight if you click on if you click on the Help button you get a full tutorial written assume you know nothing about code and nothing about music so if you know either of those things you'll whip through it if you don't it's there for you I might promise this to you is if you don't understand some of these things then please email me and I'll help you act and then I'll improve the tutorial for the next people and I can actually do a full performance and I do this weekly on a Thursday so you gotta tune in to my performances you'll see me livestream this out and then I'll do this in nightclub so so please have a play and please change your attitude about what programming is it is one of the most creative things we have available today it is something which is entirely entirely available for you to understand it's not something complicated it's just something that needs patience and just like reading or writing if you see symbols you if you couldn't read or write you see these crazy symbols when you can't read code you see crazy symbols but of course those who can write who can read it can have a much more fulfilled and exciting life because they can express themselves and Wayans just imagine how you could express yourself with code if you could learn to

Elektroniikka ja ohjelmointi

Elektroniikka ja ohjelmointi -polkuun liittyviä vinkkejä

Tämän sivun alussa on lista monenmoisia vinkkejä, ja näiden jälkeen on kaksi konkreettisempaa esimerkkiä Arduinon soveltamisesta opetukseen: ketjureaktio ja leluhakkerointi!

Mehackitin muut materiaalit

Suosittelemme lämpimästi Mehackitin avointa oppimateriaalia Arduino-projekteja Maker kitillä!

Let Me Hack It -kurssin jälkeen pystyt soveltamaan materiaalin alkupään tehtäviä vaivatta, ja voit jatkaa Arduinon saloihin perehtymistä tutkimalla jatkolukuja. Oppilaat voivat tehdä tehtäviä joko omaan tahtiin tai opettajan ohjaamana.

Tutustu myös Robotiikka tulevaisuudessa-oppimateriaaliin, jossa käydään läpi mm. Internet of Things-sovellusten, e-tekstiilien ja Raspberry Pi:n perusteita. Kurssimateriaali sopii vähän edistyneemmälle värkkääjälle.

Electronics and Programming Basics on englanninkielinen neljän oppitunnin videopohjainen kurssi joka soveltuu erinomaisesti Arduinon alkeiden opetteluun. Katso myös videopohjaiset projektimoduulit edistyneemmille rakentajille!

Arduinon omat resurssit:

  • Arduino Project Hub: Kuten arvata saattaa, sivulla esitellään Arduino-projekteja ohjeineen.
  • Arduino Forum: Arduinon ylläpitämällä foorumilla projekteja ja ohjelmointia koskeviin keskusteluihin on lähetetty jo lähemmäs miljoona viestiä. Jos täältä ei löydy valmista vastausta mieltä askarruttavaan Arduino-pulmaan, niin on luultavasti viisasta kirjoittaa foorumille ja äkkiä!
  • Arduino Create on palvelu, jonka avulla Arduinoa voi koodata selaimessa. Create tarjoaa myös projektiohjeita ja pilvipalvelun Internet of Things -sovellusten kehittelyä varten.
  • Arduinon Reference: täältä löytyy kuvaus ja esimerkkejä jokaikisestä Arduino-komennosta.

Arduino-projektipankkeja ja -tutoriaaleja

  • Adafruit: Projektiesittelyiden ja -ohjeiden lisäksi värkkääjähenkinen elektroniikan verkkokauppa Adafruit on tuottanut hyviä tutoriaaleja mm. Arduinon perustekniikoiden opetteluun
  • Sparkfun: Verkkokauppa, jolla on samantapaisia tutoriaaleja kuin Adafruitilla - usein hyvin perusteellisia!
  • Hackster.io: Vaikuttavia projektiohjeita varsinkin edistyneemmille harrastajille - ja ideoita ihan kaikille!
  • Programming Electronics Academyn ilmaiset materiaalit kannattaa myös tsekata.
  •  Onko käytössäsi laserleikkuri? Suunnittele ja leikkaa laatikko projektillesi: https://www.makercase.com/

Muita tapoja työskennellä ohjelmoitavalla elektroniikalla

  • Circuit Playground on mm. e-tekstiiliprojekteihin sopiva Arduinon sukuinen alusta, jota voi ohjelmoida Scratchin kaltaisessa graafisessa ohjelmointiympäristössä nimeltä MakeCode 
    Alkuun pääsee esim. näillä Innokas-verkoston blogin ohjeilla
  • Tinkercad Circuits on selaimessa toimiva Arduino-yhteensopiva graafinen ohjelmointiympäristö. Hienoa on, että kytkennät voi mallintaa selaimessa, ja ohjelman toimintaa voi simuloida saman tien. Tinkercad Circuitsissa voi vaihdella graafista ja tekstipohjaista ohjelmointinäkymää, mikä on myös hieno juttu. Ohjelmat täytyy ensin ladata koneelle ja avata Arduino IDE:ssä jotta ne saa ladattua Arduinolle.
  • S4A ja Snap4Arduino ovat graafisia ohjelmointiympäristöjä Arduinolle. Työohjeita mm. Käsityökoulu Robotin oppaassa
  • mBlock: vielä yksi Arduino-yhteensopiva graafinen ohjelmointiympäristö
  • PICAXE ja Micro:bit ovat muita opetuskäyttöön sopivia ohjelmoitavan elektroniikan alustoja. Innokas-verkoston suomenkielinen Micro:bit-oppimateriaali sopii jo alakouluun.
  • Pycom: IoT kehitysalusta, jota ohjelmoidaan Micropython-kielellä.

Arduinon isosisko: Raspberry Pi

Raspberry Pi on halpa, pieni ja suorituskykyinen minitietokone, joka muistuttaa vähän Arduinoa. Raspberry Pi:stä voi koota esimerkiksi edullisen mediatietokoneen kotiin, tai sitä voi käyttää Arduinon tapaan elektroniikkaprojekteissa. Tärkein ero Arduinoon on, että  [Raspberry Pi:ssä on Linux-käyttöjärjestelmä, ja siihen voi kytkeä laitteita kuten USB-näppiksen ja hiiren, kaiuttimet sekä näytön.

Vanhan Atari-pelikonsolin sisukset on korvattu Raspberry Pi:llä

Vanhan Atari-pelikonsolin sisukset on korvattu Raspberry Pi:llä

(lähde: spikesnell.com)

Mekanismeja ja elektroniikkaa

E-tekstiilit

Ketjureaktio - harjoitus joka yhdistää kaikki elektroniikkapolun aihepiirit

Ketjureaktiolla (engl. Rube Goldberg Machine) tarkoitetaan tässä systeemiä, jossa on useita, automaattisesti toisensa käynnistäviä vaiheita. Ketjureaktio tarvitsee alkusysäyksen - esimerkiksi etäisyysanturin havaitseman liikkeen, napin painalluksen, valoanturin havaitseman varjon - ja lopussa voi olla hämmästyttävä loppuhuipennus. Vai olisiko ketjureaktion tehtävänä suorittaa jokin yksinkertainen juttu hyvin monimutkaisesti mutta hauskasti?

Mehackit-kurssiohjaajien Arduino-ketjureaktio:

Mikä Rube Goldberg Machine?

Sarjakuvapiirtäjä Rube Goldberg piirsi paljon vekottimia, jotka tekivät jonkin yksinkertaisen asian hyvin monimutkaisesti mutta hauskasti. Laitteistoissa oli aina sama idea: jokin sysäys sai systeemin liikkeeseen, ja pitkän, automaattisen tapahtumaketjun jälkeen laitteisto sytytti kynttilän, avasi oven tai vaikka pyyhki soppaa syövän leuan. Piirrokset olivat niin tunnettuja, että Rube Goldberg Machine vakiintui englannin kielessä yleisnimitykseksi tällaisille kojeistoille.

Rube Goldberg: Professori Buttin automaattinen lautasliina (1931) CC0

Rube Goldberg: Professori Buttin automaattinen lautasliina (1931) CC0


Peter Fischli ja David Weiss: Der Lauf der Dinge (Asioiden kulku) 1987

1,5 minuutin pätkä on osa puoli tuntia pitkästä teoksesta jota taiteilijat Fischli ja Weiss kuvasivat kolme päivää. Videon mekanismeja on hieman hankala toteuttaa Arduinolla, mutta tämä voi olla ihan hyvä asia ideoinnin kannalta - voi inspiroitua toisen työstä ilman, että tulee kiusaus kopioida kaikki tekniset ratkaisut.

The Fortune Telling Machine

Onnenkeksin ennustus on mitä osuvin! Kuularata ja dominoefekti ovat suosittuja kikkoja ketjureaktioprojekteissa.


Ketjureaktio opetuksessa

Ketjureaktion rakentaminen ja harjoittelu oppijoiden kanssa vie vähintään pari tuntia, eikä tällaisesta laitteistosta ole mitään välitöntä hyötyä. Joskus työskentely on myös sotkuista ja vähän kaoottistakin. 

Ketjureaktion suunnittelu - joko Arduino-elektroniikalla tai ilman - on kuitenkin intensiivinen ja ryhmähenkeä vahvistava suunnittelutehtävä. Pienryhmätyöskentelyn lisäksi oppilaiden on työskenneltävä koko ryhmän kanssa, jotta jokaisen ryhmän oma tapahtuma saadaan ketjutettua toisten kanssa. 

Arduino-elektroniikka ei ole työssä välttämättömyys, ja vaikka sitä käytettäisiinkin, koodin voi tilanteesta riippuen jakaa pitkälti valmiina. Näin työskentelyä voi soveltaa eri-ikäisille oppilaille - pienimmät voivat tehdä kuularata- ja dominopainotteisen ketjureaktion jossa on vaikkapa elektroninen aloitus. Toisaalta ketjureaktio sopii yhtä lailla mekaniikan insinööriopiskelijoiden haasteeksi.

Käytännön vinkkejä:

  • Oppilaiden kanssa sopiva pienryhmäkoko on esim. 2-3. Jokainen ryhmä tarvitsee Arduinon, tietokoneen sekä mahdollisuuden käyttää muita elektroniikkakomponentteja, käsityö-, askartelu- tai kierrätystarvikkeita yms.

  • Suunnittelussa mietittävää: Millaisia vaiheita ketjureaktiossa voisi olla, kuinka se käynnistetään, kuinka monta toinen toisensa käynnistävää juttua tähän voisi kuulua, miten vaiheet käynnistävät toisensa? Kuinka ketjureaktio loppuu: onko systeemillä jokin tehtävä vai muuten vain äärimmäisen näyttävä finaali?

  • Joka ryhmälle sovitaan anturi tai kytkin, joka käynnistää näiden osuuden. Lisäksi ryhmien täytyy tietää oma "vuoronumeronsa" ketjureaktiossa.

  • Ryhmien kannattaa työskennellä riittävän suuressa tilassa, asettautuneena oikeaan järjestykseen.

  • Ryhmien täytyy kommunikoida edeltävän ja seuraavan ryhmän kanssa. Ryhmän vastuulla on ottaa selvää, mikä kytkin tai anturi seuraavalla porukalla on sekä tehdä yhteistyötä, jotta käynnistys onnistuu. Viimeisen ryhmän erityistehtävä on loppuhuipennus

    Mikä käynnistää oman vaiheen: varjo tai led valoanturin edessä, servon kytkimelle tuuppaama paino/pallo/uloke, jokin muu juttu?
    Mitä oma systeemi tekee, jotta seuraavan ryhmän vaihe käynnistyy? peittää valoanturin, sulkee kytkimen, kaataa suolaa veteen, puhkaisee ilmapallon, tuottaa valoa / ääntä...

  • Koko ketjureaktion voi toteuttaa Let Me Hack It -kurssin ohjelmointipoluilla käytetyin tekniikoin: tuunattuja ledejä, itse kehiteltyjä kytkimiä, valoantureita, servomoottoreita ja summerilla soiteltuja ääniä voi yhdistellä työssä.

  • Ketjureaktio harjoitellaan ja dokumentoidaan, ja vaikkei se onnistuisikaan täydellisesti, esitystilanne on yleensä latautunut odotuksella ja innostuksella!

Mitä ketjureaktioharjoituksessa voi opetella?

  • potentiaali- ja liike-energia käytännössä (varsinkin mekaanisessa ketjureaktiossa)
  • mekanismit: kuinka liikettä muutetaan muodosta ja paikasta toiseen
  • vuorovaikutteisen järjestelmän rakentaminen ohjelmoitavalla elektroniikalla
  • erilaisten rakenteiden suunnittelu
  • vuorovaikutustaidot: omien ideoiden esittäminen ja kehittely, ryhmätyö sekä pienen ryhmän että koko luokan tasolla, projektin työnjako ja roolitus
  • tarinallisuus, kerronta: tapahtumat täytyy ajastaa huolellisesti, jotta lopputulos valkenee katsojalle, koko vekottimella voi olla teema tai juoni (disco, ankkalampi, MM-hiihdot, kouluruokala jne)
  • prototypointi, dokumentoinnin harjoittelu: ideointi- ja rakentamisvaiheen seuraaminen, eri versioiden ja oppimisprosessin dokumentointi, ketjureaktion jakaminen teoksena.

Leluhakkerointi

Leluja voi tuunata Arduinolla tai vaikka muuttelemalla niiden virtapiirejä (ks. kohta Circuit Bending). Paristokäyttöisten lelujen modailusta ei voi saada haitallisia sähköiskuja, mutta muista kuitenkin seuraavat asiat:

  • Älä jätä purettuun leluun paristoja kun lopetat työskentelyn
  • Purettujen lelujen elektroniikka ei enää ole siististi paketissa vaan voi joskus mennä oikosulkuun: jos jotain alkaa kuumeta liikaa, poista paristot ja toimita lelu kierrätykseen
  • Pese kädet kun lopetat työskentelyn
  • Älä modaile omin päin verkkovirralla toimivia laitteita, ainoastaan paristokäyttöisiä.

Arduinolla voi

  • kehittää kokonaan uusia ominaisuuksia: lisätä moottoreita, ledejä, piezokaiuttimia lelun sisään.
  • kontrolloida lelun toimintoja esimerkiksi häkkäämällä lelun omat kytkimet
  • kytkeä lelun omia komponentteja kuten moottoreita tai ledejä Arduinoon. Tämä konsti vaatii hieman tarkkuutta ja tietoa, sillä mitä tahansa komponentteja ei voi kytkeä suoraan Arduinon portteihin. Esim. DC-moottoreita ohjataan yleensä erityisen mikropiirin, moottoriohjaimen avulla, jotta Arduino ei vaurioidu. 

Ominaisuuksien lisääminen

Oheisessa diaesityksessä on pieni, opetukseen sopiva intro Arduinosta sekä pikaohjeet ei-elektronisen pehmolelun tuunaamiseen. Koodia tässä ei ole mukana, mutta esim. viikon 4 harjoitusta voi hyvin soveltaa työssä.

Jos avaat esityksen Google Slidesissa, voit kurkata myös puhujan muistiinpanoja.

Elektronisen lelun toiminnot haltuun releellä

Rele on sähköllä ohjattava kytkin. Releitä käytetään mm. autoissa sähkölaitteiden kontrollointiin - alun perin esim. suuntavilkun nakuttava ääni tuli nimenomaan releen toiminnasta. Arduinon kaltaisissa ohjelmoitavan elektroniikan alustoissa rele on kätevä: pienellä jännitteellä voi ohjata suurempaa jännitettä käyttäviä laitteita turvallisesti.

Arduinon kanssa yhteensopiva relekortti, jossa on varsinaisen releen (sininen loota) lisäksi tarvittava elektroniikka ja muut osat, jotta kytkeminen Arduinoon helppoa.

Arduinon kanssa yhteensopiva relekortti, jossa on varsinaisen releen (sininen loota) lisäksi tarvittava elektroniikka ja muut osat, jotta kytkeminen Arduinoon helppoa.

Suomessa tällaisia relekortteja myyvät mm. Ihmevekotin ja Partco

Kun käytetään relettä lelun kytkemisessä, ei tarvitse huolehtia siitä, että lelun elektroniikka aiheuttaisi häiriöitä Arduinolle. Rele pitää molempien laitteiden virtapiirit erillään toisistaan, ja lelu saa käyttöjännitteensä paristoista, ei Arduinosta. Arduinon tehtävänä on ainoastaan kytkeä releen avulla lelun toiminnot päälle ja pois. Hienous piilee siinä, että Arduinon anturien avulla lelu saadaan reagoimaan esim. lähestyvään ihmiseen, valon määrään, ääneen, kiihtyvyyteen tai kaatumiseen - ja lisäksi voidaan ottaa mukaan vaikka Arduinolla ohjattavia led-valoja, moottoreita  ja piezo-ääniä.

Releen lisäksi vastaavan kytkennän voi tehdä esimerkiksi transistorilla ja optoerottimella (optocoupler). Transistorin käyttö neuvotaan  Arduino-projekteja Maker kitillä luvussa 3 / Tehtävässä Haaste: Leluhakkerointi. 

Kuvassa on puretun lelun elektroniikkaa. Lelussa on useita kytkimiä (harmaat napit ruskealla pohjalla). Yksi näistä on irrotettu ja jäljelle jääneet keltaiset johdot on kytketty releeseen. Lelussa on omat paristot sisällä.

Kuvassa on puretun lelun elektroniikkaa. Lelussa on useita kytkimiä (harmaat napit ruskealla pohjalla). Yksi näistä on irrotettu ja jäljelle jääneet keltaiset johdot on kytketty releeseen. Lelussa on omat paristot sisällä.

Releen kytkentä Arduinoon

  • Varmista, missä järjestyksessä oman releesi pinnit ovat - GND kytketään maahan, Vcc jännitteeseen ja viimeinen pinni (nimetty esim. In1 tms.) johonkin digitaaliseen porttiin - tässä esimerkissä porttiin 7.
  • Vasemman ylänurkan piirilevy esittää lelun alkuperäistä elektroniikkaa. Keltaiset kytkinjohdot on kytketty releeseen.
    Releellä on kaksi moodia: NO (normally open) ja NC (normally closed). Toinen sisääntuleva johto kytketään aina keskelle. 
    Riippuen siitä, kumpaan laitaan toinen johto kytketään, piiri joko on *normally open (*normaalitilassa ei kytkettynä,  ohjaussignaali sulkee kytkimen) tai *normally closed (*kytkin on suljettu, ohjaussignaali avaa kytkimen). 
    Asianlaita selviää testaamalla, ja johtojen paikan vaihtamisen sijaan logiikan voi kääntää mieleiseksi myös ohjelmoimalla.
  • Esimerkkikytkennässä on käytetty lisäksi valovastusta, ja lelun sisälle on tungettu servomoottori.

Esimerkkiohjelma

int anturi; //muuttuja esim. valovastuksen, etäisyyssensorin tai mikrofonin arvojen tallentamiseen

void setup() {
  Serial.begin(9600);
  pinMode(7, OUTPUT);  //portti jossa rele on kiinni
}

void loop() {
  anturi = analogRead(A0);
  Serial.println(anturi);
 
  if (anturi < 300) {
    digitalWrite(7, HIGH);  // relettä käytetään digitalWrite-komennolla
    delay(200);
    
  } 
  else {
    digitalWrite(7, LOW);
    delay(200);
  }

}