Tune That Beep

Educator notes

Educator Intro

Length of the chapter: 60 - 90min

Adjust the length of the chapter according to the time you have at hand. There are more detailed lesson plans on the next page.

Learning Objectives

The student…

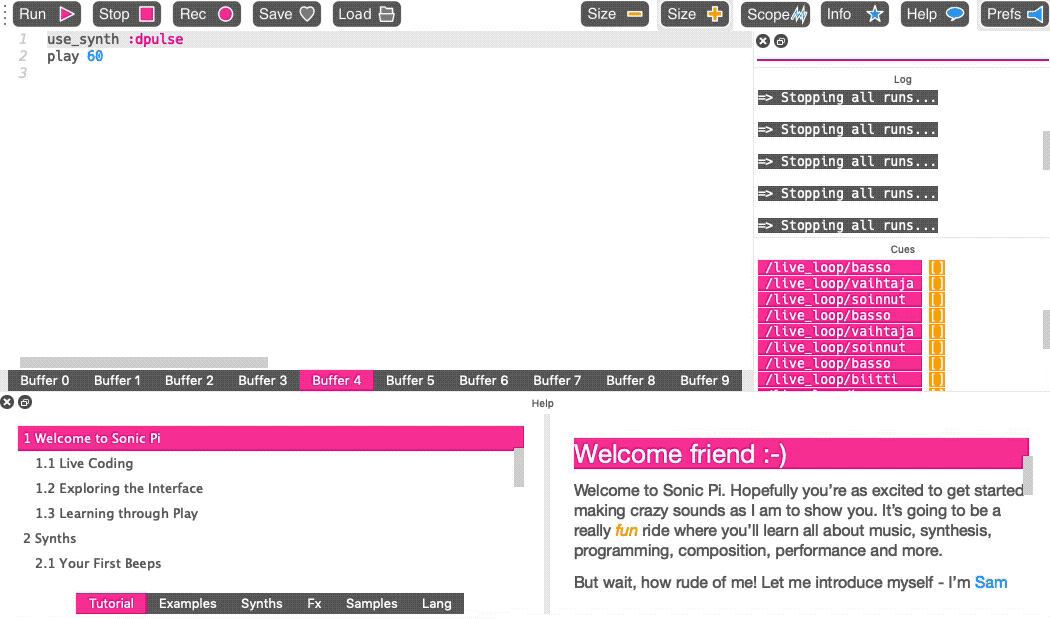
  • …can change sounds with the command use_synth
  • …gets to know the different synthesizers in Sonic Pi
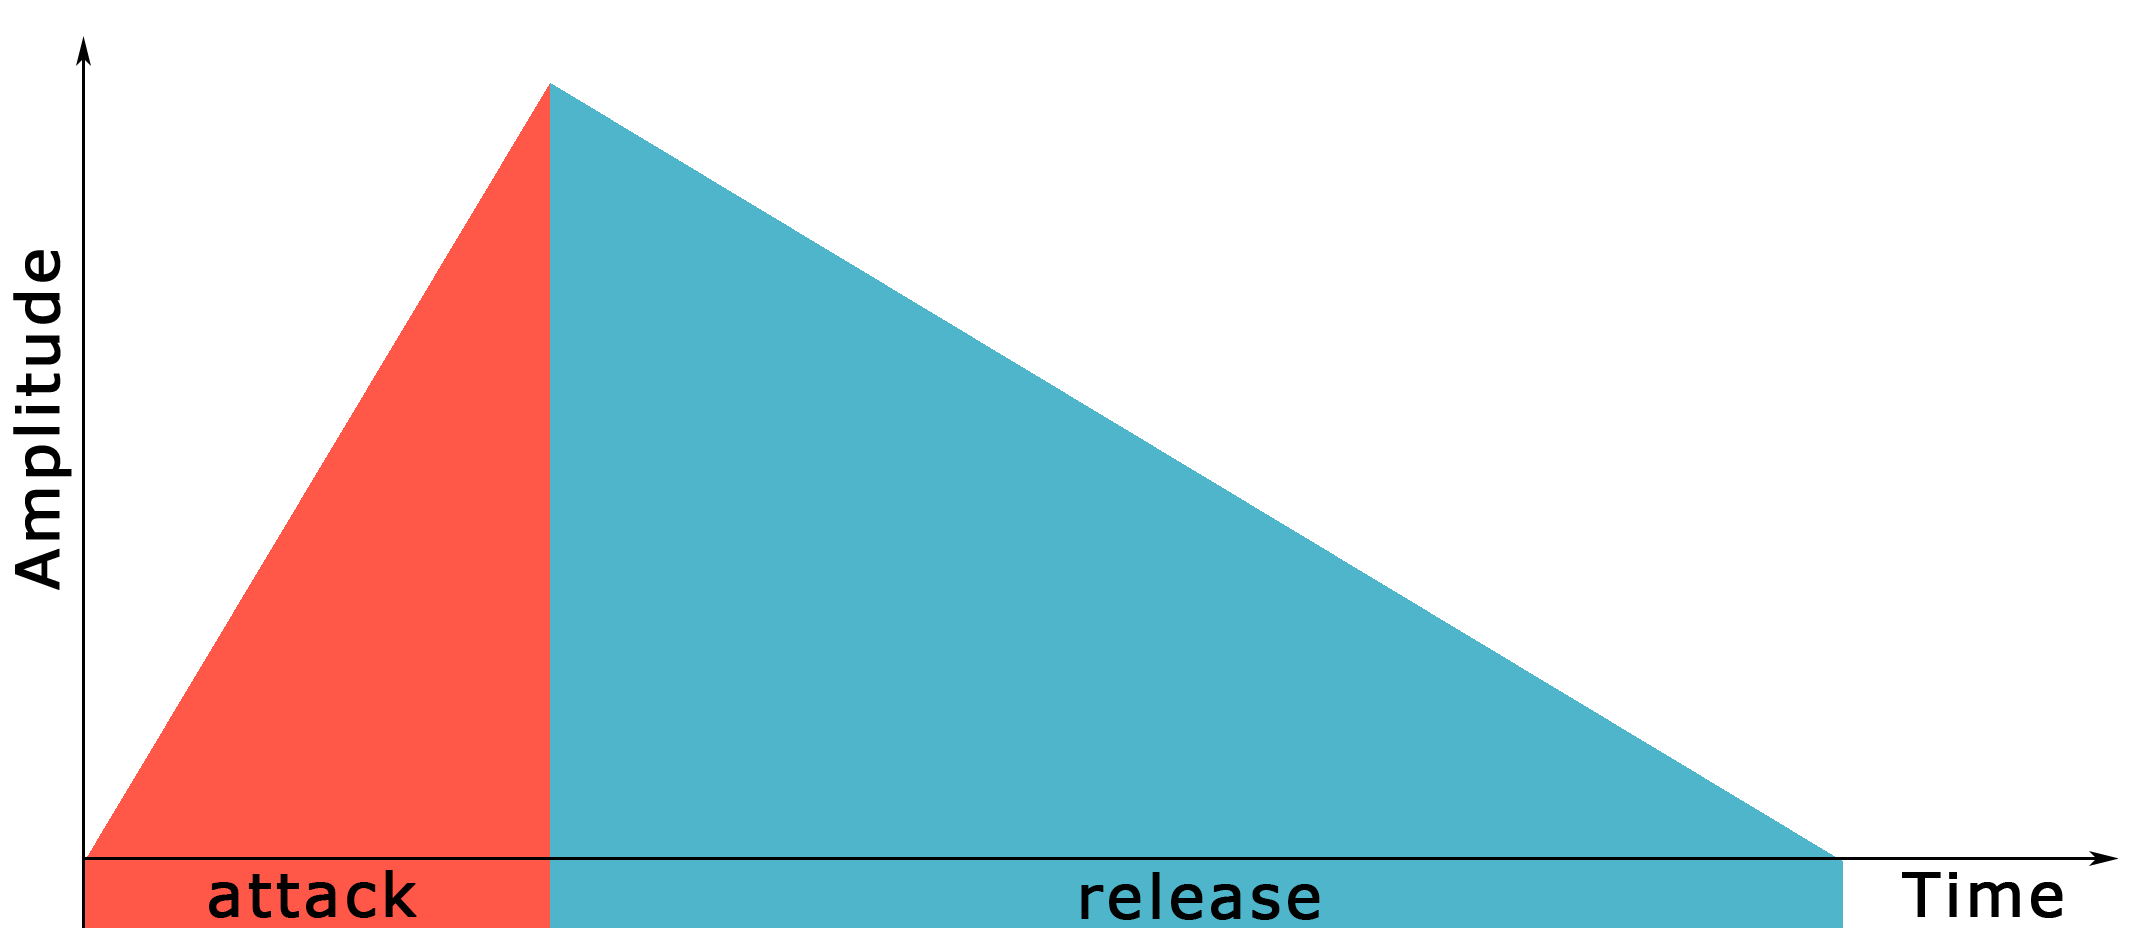
  • …knows how to shape the sound of the synthesizer with options attack: and release:
  • …can use the built in reference efficiently
  • …knows how to write a simple bass line for an existing drum beat

Slides and Lesson Plans

You can use the slides below to introduce the third chapter to the students. There are speaker notes in the slides that explain them. To see the speaker notes, click Options > Open Speaker Notes in the bottom panel of the slides or press s. There are similar slides in the Educator Intro of every chapter.

Also see the lesson plans below the slides!


Plan 1 - Structured lesson (90 - 120 min)

Time to completeActivity
10 min

Scrum-routine: All students (or pairs of students) tell after each other the following things: 1) what they were doing in the end of the previous lesson and 2) if they had any challenges they would need help with. If students are shy to speak when others are listening, you can and talk with them individually later on the lesson.

It doesn't matter if some students are still doing the tasks of the second chapter. You can help those students personally after introducing the third chapter to everyone.

10 min

Introduce the third chapter with the slides above

10 - 20 minStudents start the third chapter alone or in pairs and go through the topic It's a Synth. Ask the students to raise their hand if they have any challenges.
Walk around the classroom while the students are working and discuss briefly with each student. Talk especially with those who have had challenges or seem to lack motivation. Make sure that every student has some kind of meaningful goal for this lesson.
10 minAsk the students if they have had any challenges so far.
If needed, explain the use of options in detail, especially if the students have trouble with multiple options
10 - 20 min

Students continue with the topic Programming Those Beats!

 Ask the students to raise their hand if they have challenges.

15 min

Reflection discussion: What have you learned until now? What has been most interesting? Do you have ideas of what to express with the new programming tools?
Introduction to exercise
- The task is to write a bassline for a looping beat

- Encourage the students to use a beat they made in the last lesson

- Show an example result

20 - 30 minStudents work on the exercise 
5 minYou can end the lesson (or start the next lesson) by going through a couple of loops the students have made, if they are willing to show them.

Plan 2 - Freely flowing lesson (90 - 120 min)

Time to completeActivity
10 min

Scrum-routine: All students (or pairs of students) tell after each other the following things: 1) what they were doing in the end of the previous lesson and 2) if they had any challenges they would need help with. If students are shy to speak when others are listening, you can and talk with them individually later on the lesson.

It doesn't matter if some students are still completing the tasks of the second chapter. You can help those students personally after introducing the second chapter to everyone.

5 min

Set a goal for the third (and fourth) lesson: complete the third chapter. Show the exercise of the chapter to the students with a projector and speakers.

Ask the students to start from the topic Tune That Beep and then continue forward. Ask the students to raise their hand if they have a any questions.

40-70 min

Walk around in the classroom while the students are working and discuss briefly with each student. Talk especially with those who have had challenges or seem to lack motivation. Make sure that every student has some kind of meaningful goal for this lesson.

If you feel that students have trouble understanding using options or synths, explain them to everyone together. Check the Educator Notes for more teaching tips related to these topics.

10 min

Reflection discussion: What has been most interesting? Do you have ideas of what to express with the new programming tools?

Introduce the Exercise. If some students have started or completed it already, it doesn't matter.
- Show an example result or show something you have coded yourself.
- Give a time-limit: 10 minutes/exercise!

20 min

Students develop their own loops.

5 min

You can end the lesson (or start the next lesson) by going through a couple of loops the students have made, if they are willing to show them.


It’s a Synth

Transcript

Hi I'm Antti from Mehackit good to have you back. You already know how to make looping beats with samples and the live_loop command. You may even have tried to combine a melody with your beat. So far you have been stuck with the same sound when you write melodies... but that's about the change! So how do you make all those awesome sounds? Well here's a simple melody that's not all that exciting. To change the sound I'm going to use a command called use_synth. I'll type that in the beginning of my code. Now, when I press the spacebar I get a drop-down menu. This is a list of all the different sounds available in Sonic Pi and you can choose any one of them by pressing enter or by double clicking one of them. By default Sonic Pi uses the :beep sound so I will skip that one. Nice, my boring melody already got so much better and it only took one line of code. The use_synth command doesn't actually make any sound by itself, so if I don't have any play commands, I can't actually hear anything. use_synth simply tells Sonic Pi to use the sound you chose for all the play commands written after it. It's like grabbing an instrument and getting ready to play it. But the instrument doesn't make any sound by itself. When I tell myself to play, there is sound. Just like there's a lot of different instruments, there's also a whole lot of synthesizers in Sonic Pi. Each one of them has a different use and the best way to discover them is by experimenting. Now try out different sound by yourself.


Do this
Try out the different synthesizers of Sonic Pi with the use_synth command. You can get back to the drop down menu by pressing backspace until you hit the use_synth command and then pressing space again. Remember, that the command only affects the play commands that come after it and that it will never make sound on its own!

use_synth will:
What is the default synthesiser Sonic Pi uses?

Educator notes

Some learners may try to use the use_synth command without actually using play commands. Remind them that it only affects the play commands that come after use_synth and that it won’t make any sound on its own.

It’s good to remind learners that only the instruments found in the list of the drop down menu will change the sound of the play command. An unknown name for a synthesizer will cause a runtime error when Sonic Pi tries to play a note with it. Some learners may be confused to find that there is a :piano sound but no :guitar for example. The best way to avoid these issues is to encourage the learners to always use the drop down menu for choosing the synthesizer.


There’s Options


Do this

Use the release: parameter to make your sound shorter

Use the release: parameter to make your sound longer

Hint: The default value for release is 1. Try to use different numbers to hear their effects!


The value of release: is measured in:

Educator notes

Whenever you use an option, you have to place a comma before it. Unfortunately, Sonic Pi will show the drop down menu for options even if you press the spacebar after the play command. If you forget the comma, you will end up with a syntax error. Forgetting commas is one of the most common problems learners will have when they can’t get their code to run with options. Learners may be confused by the resulting error message, which will complain about a missing end keyword. Instead, encourage the learners to look at the line of code where the error is located.

There’s More Options!

Transcript

You may have noticed there's quite a long list of different options available. Maybe you've even tried some of them. How do you know what the options do and what numbers to give them? There's a really helpful glossary of all the available commands in Sonic Pi and you can find it in the help tab down here. You can also instantly access the help page of a command by moving the text cursor over the command and pressing control+i. When I do that with the play command, I see that there's first a lot of information about what the comment does. When I scroll down, there's a list of the options and descriptions of what they do and what kind of numbers they expect. Finally there's a list of examples of the command in action. You can even copy them to your code. Fun fact: the glossary of commands is called the programming language reference. All programming languages have a library like this and learning to use it is an invaluable skill for any programmer. Whenever you encounter a new command or forget what a command does, the reference will provide you with the help you need. I'm going to use the attack option to change how fast a note reaches full volume. I can see here from the reference that the value for attack is in beats. I want my sound to fade-in gradually over to beats, so I'll use 2 for the value. Now I have a nice fade-in but what if I also want the sound to last longer? I can give the play command as many options as I want. I just have to separate each one with a comma. So I'll use the release option here to make it longer. The total length of the note can be calculated by adding the attack and the release values together. In this case the total length of my play command is 5 beats. Now try using both the attack and release options for a single play command! If you're feeling adventurous, you can also have a look at the reference and try out some of the other options.

There are so many options for the play command that sometimes it can be hard to know where to get started! Here is a list of some of the more useful options that you should definitely try out!

amp: amp changes how loud a sound is! A value of 1 is the default volume. If you find that some sound is too loud, you can make it quieter by using a value smaller than 1. You can make things louder by using values bigger than 1 — but watch out: values too high will cover all the other sounds.

pan: Pan moves the sound around. It’s easiest to hear this with headphones! A value of -1 will play the sound from the left speaker and 1 from the right. Values between these two will move the sound from one speaker to another. pan: 0 will play the sound from both speakers.

release: this option changes how long a note will sound for. The value is in beats.

attack: changes how long it will take until a note reaches full volume. The value is in beats.

sustain: This option changes how long the play command will stay at full volume


Do this

Use both the attack: and release: options for a single play command. Remember that you can always access the reference to find information on how the options work. Just press ctrl + i when your text cursor is over the command you want to find out more about.

Hint: Don’t forget to place a comma between options!


What is the shortcut for accessing the reference inside Sonic Pi?
play 50, attack: 2, release: 0.75, pan: 1

What is the length of the note above?

Educator notes

Learning to use the reference is essential for efficient programming. When learners have questions about specific commands or options, encourage them to look up solutions by themselves from the reference. It’s better to explain how to use the reference than to explain the commands in detail.

Remember, ctrl + i is your friend!

With more options, the risk of forgetting a comma increases. It will also take more debugging to find the possible mistakes since there is more content on one line. One strategy is to comment out one option at a time starting from the end and seeing if the code runs. For example:

play 60, attack: 3 release: 2, amp: 0.5 

Doesn’t work

play 60, attack: 3 release: 2#, amp: 0.5 

Still doesn’t work

play 60, attack: 3 #release: 2, amp: 0.5 

This works. The error was a missing comma before release!