Are you ready to make your own music by programming? In Music Programming Basics you will learn the essential skills to make your own songs with beats and melodies with a program called Sonic Pi. It is the perfect place to get started with creative technology and learn the basics of programming in a fun and engaging way!
You’ll get to create your own song by writing code. You also learn some of the basics of electronic music production and music theory by using the sounds and tools that come with Sonic Pi.
Target group: 13-19-year-olds and educators. This module is absolutely beginner-friendly and requires no previous experience on music production or programming.
Length: 4 chapters 1,5-2 hours each (= 6-8 hours). Material can be adjusted for longer teaching sessions as well.
Format: Suitable for blended teaching and self-studying. Self-paced course module with video tutorials, student assignments and educator instructions
Structure: There’s four chapters and an extra-chapter for educators.
For the educator
Click on the bar below to open educator information!
Throughout the material there are educator notes such as this that are designed to help you succeed in a classroom situation. Click them to open them! The first educator note of a chapter is always a longer Educator Intro that you can use to prepare for the lesson.
This material is designed to be used in a blended learning environment, even though students work online, you can help navigate and facilitate their learning in the classroom.
This material is easy to use - there’s no need for long preparations.
If you want to start teaching right away, see the Checklist For The First Lesson. See also the Educator Intro in the beginning of the first chapter.
If you have more time, browse through this For the Educator -chapter then jump to the Educator Intro in the first chapter to plan your first lessons.
Module Overview
The aim of this course is to help you to get started with teaching music programming with Sonic Pi. We provide you and your students with materials that allow anyone to learn the basics. You are now in For The Educator -chapter which is followed by the student material that consists of 4 chapters. Each chapter is approximately 90 minutes long but it’s possible to proceed at a slower pace, as well.
The structure of this module:
Your First Beeps (30-90 min)
Create Drum Beats (60-120 min)
Write a Bass Riff (60-120 min)
Finish Your Song (60-120 min)
Educator Materials
The Educator material is divided as follows:
For the Educator - You are here right now. Essential preparations before teaching, installations and software, learning objectives and assessment.
Educator Intros are found in the beginning of every chapter and include the following things.
Chapter Summary - A video about the chapter and learning objectives.
Slides and Lesson Plans - Introductory Slides and possible lesson plans.
Educator Notes are placed in the material and include extra-information, right answers to the coding tasks, pedagogical tips and ideas for activities in the classroom.
Install Sonic Pi to School Computers
Installing Sonic Pi
You can download Sonic Pi version 3.1 (or later) from Sonic Pi’s official web site. For Linux the latest available version is Sonic Pi 2.1.
http://sonic-pi.net/.
Once you have downloaded the package for your operating system you can start the installation process by following these instructions.
You will need administrator level rights to do the installation. Usually the IT support personnel in your facility has these rights. If you need to give them a PDF of the installation instructions, you can download it below. Remember that you will have to do the installation for each computer used.
Download Sonic Pi installer for Windows, choose the MSI version
Once download is complete, open the installer by double-clicking the
downloaded file
Click 'Yes' or 'Next' in all the installer dialogs
Once the installation is complete, open Windows Start menu, choose
Sonic Pi from the list of applications and double-click it to
start.
Mac OS:
Download Sonic Pi installer for Mac
Once download is complete, open the installer by double-clicking the
downloaded file
Drag Sonic Pi application icon to the Applications folder
Open Finder and go to your Applications. select Sonic Pi and
double-click the application icon to open it
If Mac OS refuses to open Sonic Pi, you can right click the Sonic Pi
icon and choose ‘Open’. Choose ‘Yes’ in the following dialog window
and Sonic Pi should open.
Linux or Raspberry Pi:
We won't cover Linux or Raspberry Pi installation here but there are
many online resources that will help you to
get Sonic Pi running on your system: Raspberry Pi and
Linux.
Testing Sonic Pi
Most of the schools and facilities have more strict user rights for
students and some of these settings can cause hiccups with Sonic Pi.
That’s why we recommend you to test Sonic Pi with a student profile.
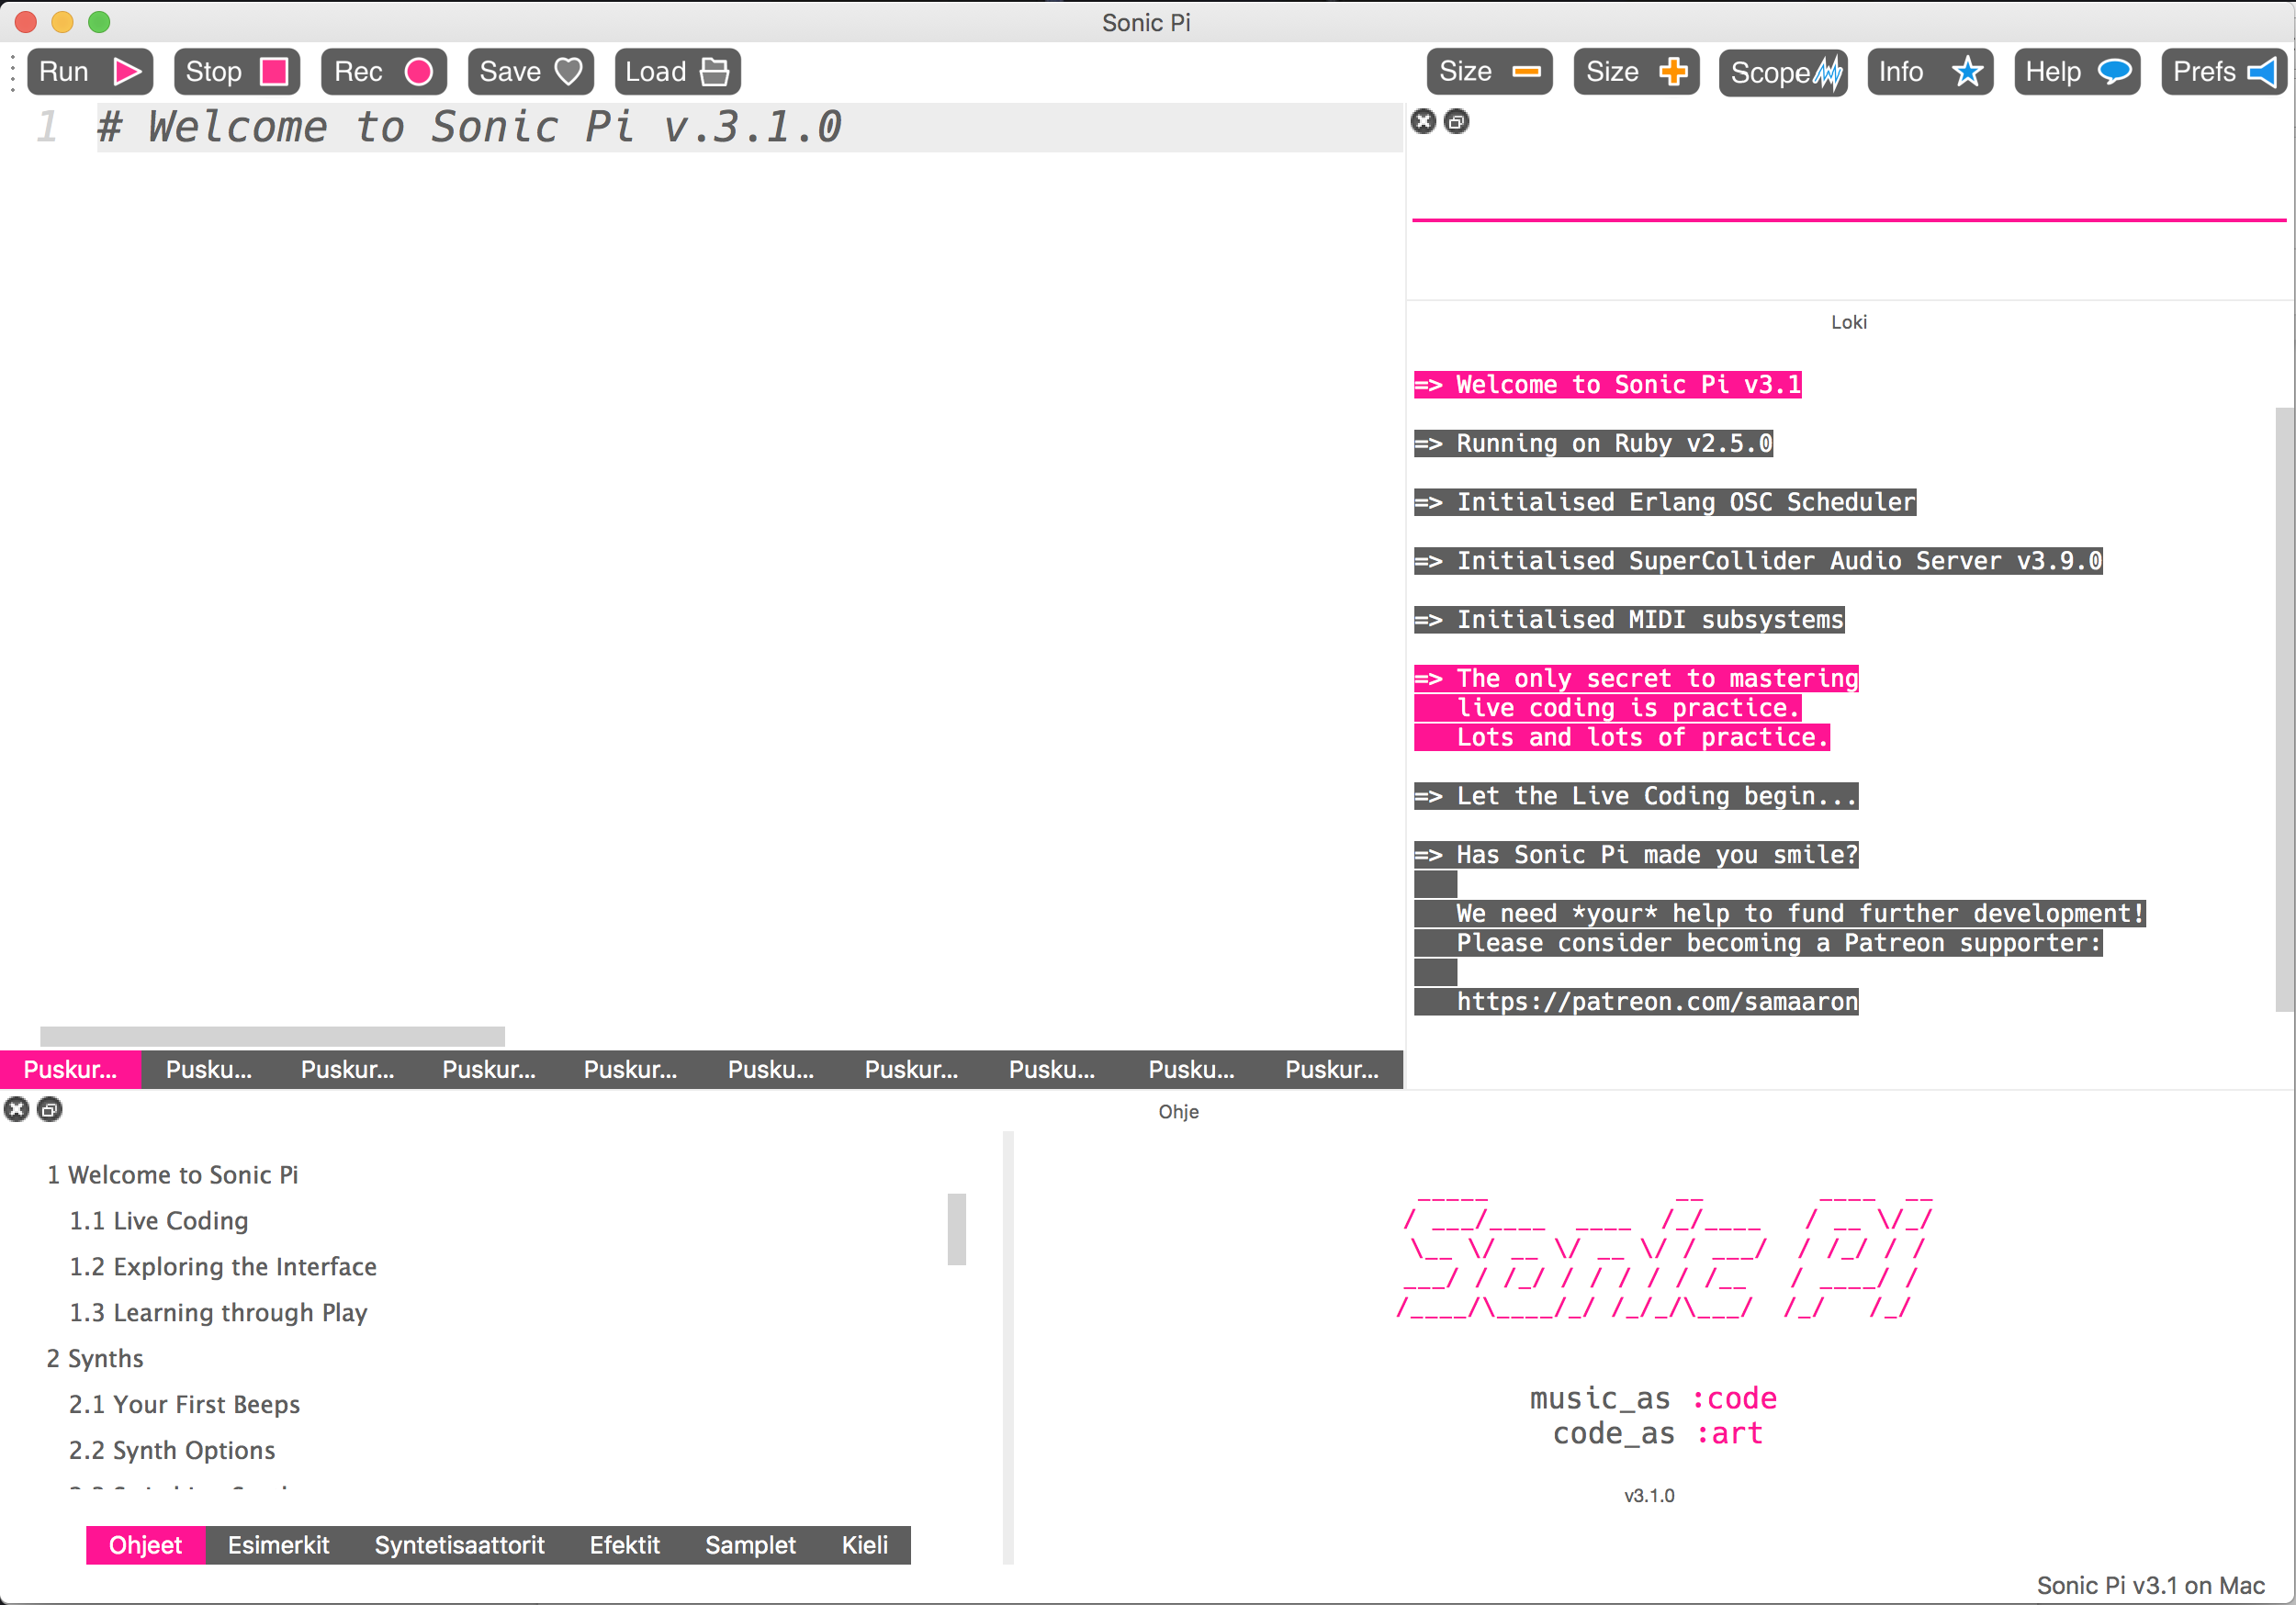
Open Sonic Pi. You should see a window like the one below.
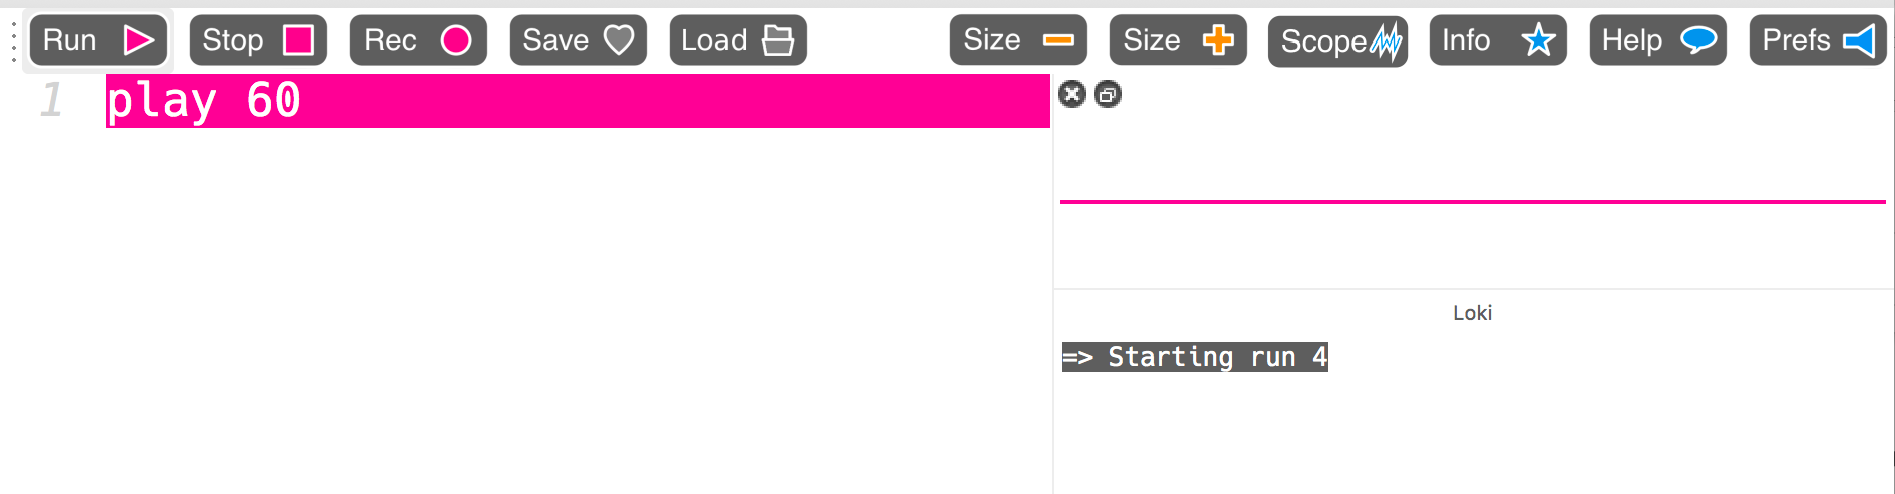
You should first try to make a sound with Sonic Pi. Write play 60 in
the editor just below the “Run” and “Stop” buttons. Once you have play
60 written there hit the “Run” button.
The first thing you’ll notice is the line where you have written the
code will flash in color…
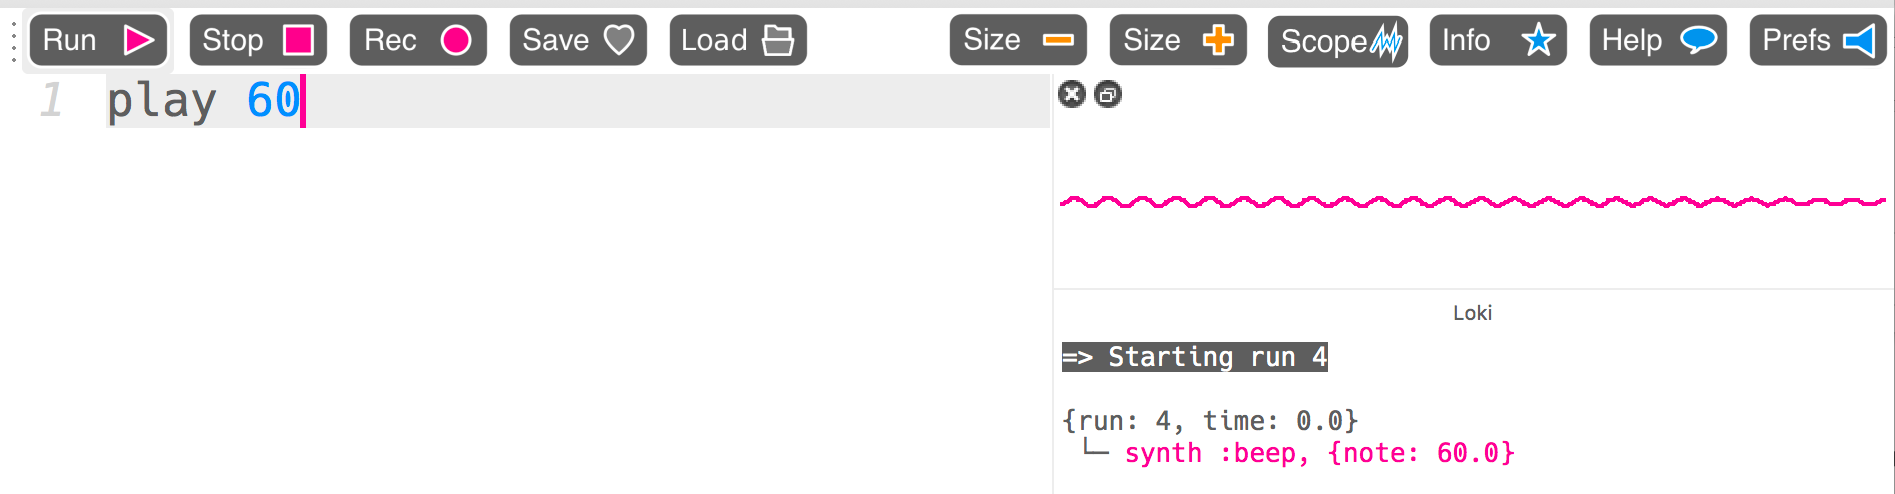
… and you will hear a sound resulting from the command play 60.
You’ll also notice that the sound waves are visualized in the smaller
windows on the right. Animated sound waves appears in the window called
Scope. There is also text output (like synth :beep, {note: 60.0}) in
the window called Log below the Scope window.
Problems?
If everything hasn’t gone smoothly in the installation or you don’t hear
a sound coming out of Sonic Pi, please see the page Sonic Pi Troubleshooting for
resolutions to some of the most common problems that occur.
A desktop or laptop computer (Windows, Mac, Linux or Raspbian) with Sonic Pi installed.
If students bring their own devices with them, they can install Sonic Pi before or at the first lesson.
Internet connection
A keyboard and mouse (or a trackpad)
A pair of headphones or speakers
Headphone splitters (if the students work in pairs)
You will need:
A computer with all of the above mentioned settings
A display connection to a projector or another display device
Audio connection to a pair of speakers
A Portable speaker is awesome! You can carry it with you around the class and plug it in to students’ computers and let the students play their tracks.
The content is quite self-explanatory and works well for independent learning. You can begin by leading students to the material, observing their learning and helping them when they ask questions. But students may get more out of the whole experience if you plan a structure for each lesson: give an introduction where you set a clear goal for each lesson and summarize what has been learned at the end of each lesson.
Besides making the learning objectives clearer, this makes the lessons more collaborative. Instead of only individual learning at the computer, it teaches students how to work collaboratively and use each other as problem solvers. Positive interaction also boosts creativity and makes students less afraid of making mistakes. If you yourself are active, students will become active too and will help each other in the class.
There’s slides and example lesson plans in the Educator Intro of each chapter (link to introductory slides of the first chapter).
Routines for The Lessons
Browse the slides by clicking the arrow-buttons in the lower panel. These slides are not designed to be presented in the classroom.
The teaching should be focused primarily on helping students with individual challenges as they come up. The material encourages the students to start creatively tinkering with the code from the very start. This means that not everyone will produce similar results. Student might need your help and support if there’s errors in their code, they don’t understand the new concepts or they lack ideas of what to do in a creative exercise.
Even if you have mastered programming, students will usually ask something that you can’t answer right away. This doesn’t have to be a threat, it’s a possibility to explore the world of creative coding together with the students.
When the students ask for help with the material, you should facilitate a discussion with them. In the following graph, we’ll try to illustrate how these discussions usually proceed and how can you answer to the different needs of the students. The main point is that usually you don’t have to give a right answer. Instead, ask a couple questions that lead students in the right direction.
There’s other ideas for facilitating student work in the slides below. You can browse the slides with the arrow-buttons in the lower panel. These slides are not meant to be presented in the classroom.
During this module you will learn the very basics of programming
music. We want to approach technology in creative and cross-curricular way that makes it possible for everyone to get inspired about it.
The main objectives of this Basic Module are listed below. Learning
objectives are divided to Programming, Music and Creative Project Work. The more specific learning objectives of each chapter can be found in the Educator Intros-
… can make, save and run a program in the Sonic Pi environment
… can understand what is a syntax of a programming language
… can write basic programming commands from scratch with the right syntax
… can understand how a computer reads the program
… can read error messages and fix the program according to them
… can do sequencing with functions and Iteration with code blocks
… can read comments and use them to explain the code.
… understands that programming can be a creative skill, like writing or playing!
… can understand the difference between linear and multi-threaded programming!
Music
The student…
… can understand the concept of notes and octaves
… can change the tempo of a song
… can write simple melodies
… can use various synthesizer sounds included in Sonic Pi
… can modify sounds with options
… can program drum-beats with samples
… can write a simple bass line
… understands the role of repetition in music
… can use effects in songs
… can reflect on the musical decisions made in the projects.
Creative Project Work
The student…
… learns to search for inspiring projects in the web
… knows the meanings of different creative commons licences and the limits of copying others’ work.
… learns to find answers to programming-related questions in the web
… can develop one’s own musical idea with the given subject and programming tools
… can give constructive feedback on the creative projects of others.
… can utilise the feedback given by others to develop their own project further
Curriculum References
Mehackit Atelier is designed to help students to learn programming in a
creative cross-curricular way. Many contemporary national curriculums
address the importance of learning to use ICT and programming in a
project-based manner. The importance of creativity, thinking skills and
the ability to work independently is emphasized as well, among many
other so called 21st century skills.
Below, there are documents with references to three national
curriculums. We have selected quotes and learning objectives from the
curriculums that match with the learning objectives of Mehackit Atelier
and this module.
There’s other assessment ideas in the following slides. You can browse the slides with the arrow-buttons in the lower panel. These slides are not meant to be presented in the classroom
If you don’t hear anything coming out of Sonic Pi, here are a few common
problems and solutions to fix them!
Problem: Sonic Pi is running but there is no sound coming from my
computer! I can hear sounds from other applications (for example,
YouTube or any media player) Answer: Try shutting down Sonic Pi and restarting it. If the problem
still persists, try rebooting the whole computer and then restart Sonic
Pi.
Problem: Sonic Pi is running but there is no sound coming from my
computer! I can’t hear sounds from any other applications either Answer: Please check that you haven't muted your computer speakers.
On Windows, you should be able to access sound volume settings from the
taskbar. Usually the volume icon is located next to the clock on the
right side of the taskbar. If it’s not visible, try finding more
information here: http://www.thewindowsclub.com/volume-icon-missing-from-taskbar-windows. On Mac OS, you can find a similar volume icon at the top right corner of
the screen in the menu bar. Be sure that you can get sound with
headphones both connected and disconnected.
Problem: When I try to open Sonic Pi I get a dialog saying “Server
Error” Answer: Try shutting down Sonic Pi and restarting it. If the problem
still persists, try rebooting the whole computer and then restart Sonic
Pi.
Problem: There is no sound and no messages in the Log window Answer: Try shutting down Sonic Pi and restarting it. If the problem
still persists, try rebooting the whole computer and then restart Sonic
Pi.
Problem: There’s an error in my code and I don't know how to fix
it! Answer: Please see where the debug information in the error dialog
leads you to. It is often mentioned in which buffer you can find the
error in and on what line. For example, Buffer:6, Line:20, tells you
that the error is located in Buffer 6 and on line 20. To accompany that,
you should see a red arrow in the programming panel on the line where
the error is located. If that doesn’t work, please see that all your
code blocks have both do and end words! For each do there should
be an end.
Problem: There’s too little space for me to read my code Answer: Try decreasing the font size with the Size- icon at the top
right corner of Sonic Pi UI. Alternatively, ALT+/CMD+ and ALT-/CMD- are
the shortcut keys for the font size controls.
Global Sonic Pi Community
The official discussion forum for Sonic Pi is called In Thread and
you can find it
here: in-thread.sonic-pi.net/.
There is a wonderful community consisting of educators, developers and
artists who passionately share ideas about Sonic Pi. We can recommend
you to sign in on that site and start contributing with your questions
and ideas. If there’s a specific question on your mind about Sonic Pi,
just post it on the forum! Most likely someone there will respond to
your question within a few hours.