Task
Upload this Arduino code to the board and check that you get correct values into the serial monitor.
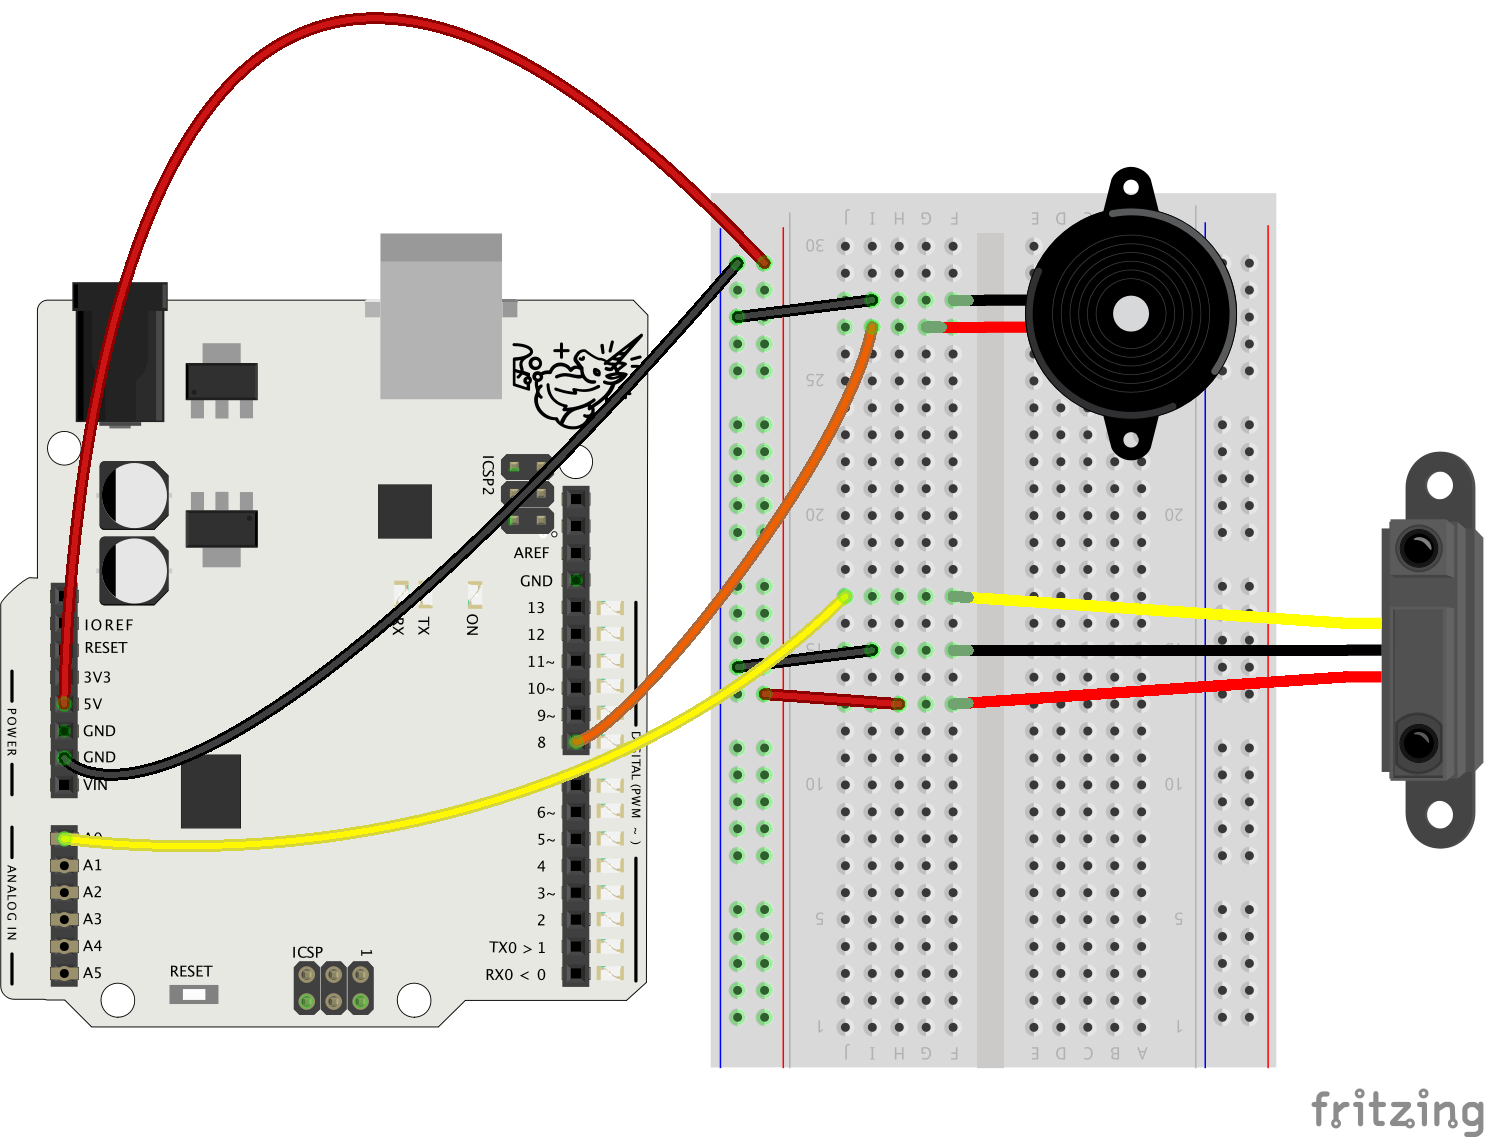
In this project, Arduino is used to control graphics that are produced with another open-source programming environment, Processing.
Values received from a distance sensor connected to Arduino are sent to the Processing IDE through serial communication - the same serial protocol that you’ve used to print values in the Serial Monitor!
Download processing here https://processing.org/download/

The piezo buzzer is an extra component just for fun - the IR sensor is the most important part! You can add more sensors to the circuit later on.
void setup(){
  // initialize serial communications at a 9600 baud rate
  Serial.begin(9600);
}

void loop()
{
  // read and scale the value from pin 0
  int distance = analogRead(0);
  int buzzer = map(distance, 0, 2013, 100, 2000);
  tone(8, buzzer);
  // send the scaled value over the serial port
  Serial.println(distance);
  delay(100);
}
When you first open Processing IDE, it looks like this:
The look and feel is similar to Arduino IDE, and the code has similarities, as well.
/*
 * Mehackit introduction to creative programming
 * 01_Start - Demo
 * Mehackit, 2015

 * Draw with mouse
 * Press 'c' to erase screen.
 */
// The statements in the setup() function
// execute once when the program begins
void setup() {
  size(600, 600);  // Set size
  background(100); //paint background with gray
  stroke(0); // set stroke color to black
  fill(255); // set fill color to white
}
// The statements in draw() are executed until the
// program is stopped. Each statement is executed in
// sequence and after the last line is read, the first
// line is executed again.
void draw() {

  if (mousePressed) { // if mouse is pressed, execute the following code
    float radius = random(50, 80); // create a random number between 50 and 80 and save it to a variable called 'radius'
    ellipse(mouseX, mouseY, radius, radius); // draw an ellipse to the mouse location, using the random 'radius' variable as radius
  }
  // if a key is pressed and the key is 'c' draw background again
  // drawing the background again clears the picture
  if (keyPressed == true && key == 'c') {
    background(100); //paint background with gray
  }
}
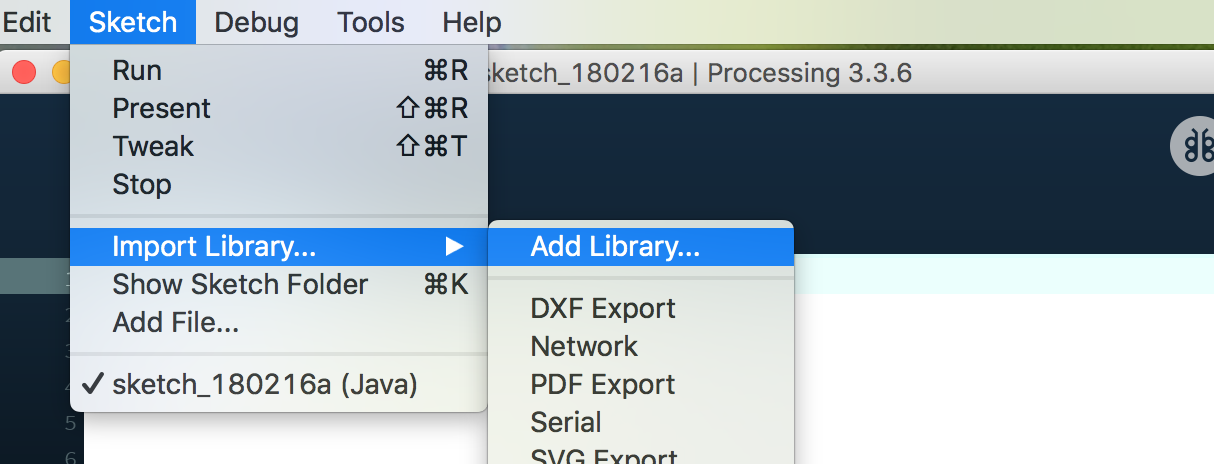
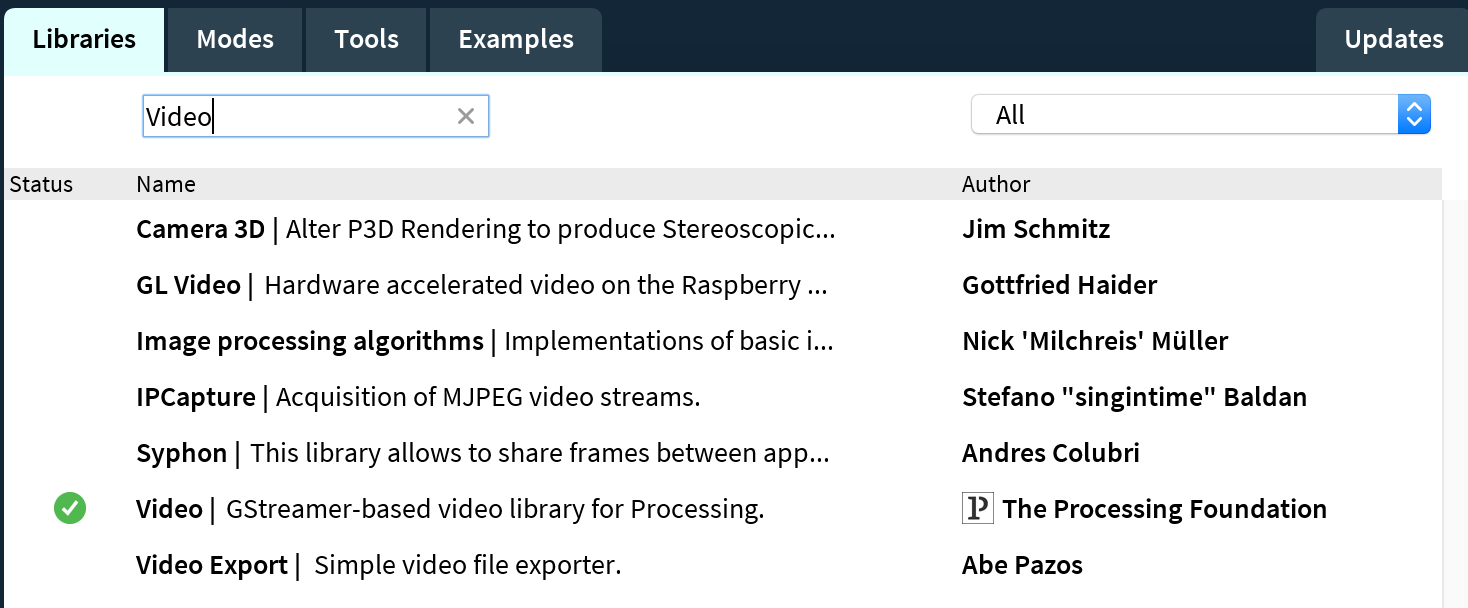
Before you can test the code of this example project, you must install the Video library to Processing IDE:
You may have to change the number inside the brackets of this command:
String portName = Serial.list()[3];
Check the console to find the right number - it is the one that precedes the name of the port your Arduino is connected to.
If you don’t remember the name of the Arduino port, got to Arduino IDE -> Tools -> Port.
Try to change the numbers in the formulas that affect the size and color of the dots on the screen!