Task
Send the program to your Arduino. Pay attention to the infrared distance sensor reading from Serial monitor and change the parameters of the if-statement if needed.
We’ll develop the robot of the previous exercise to be smarter: we’ll add a proximity sensor and program the robot to avoid obstacles.
In addition to Mehackit-board (or Arduino), breadboard, wires, and USB cable, you’ll need:
| Part | Image | Description |
|---|---|---|
| Assembled moving robot (as in the exercise Robot Running on Wheels) | 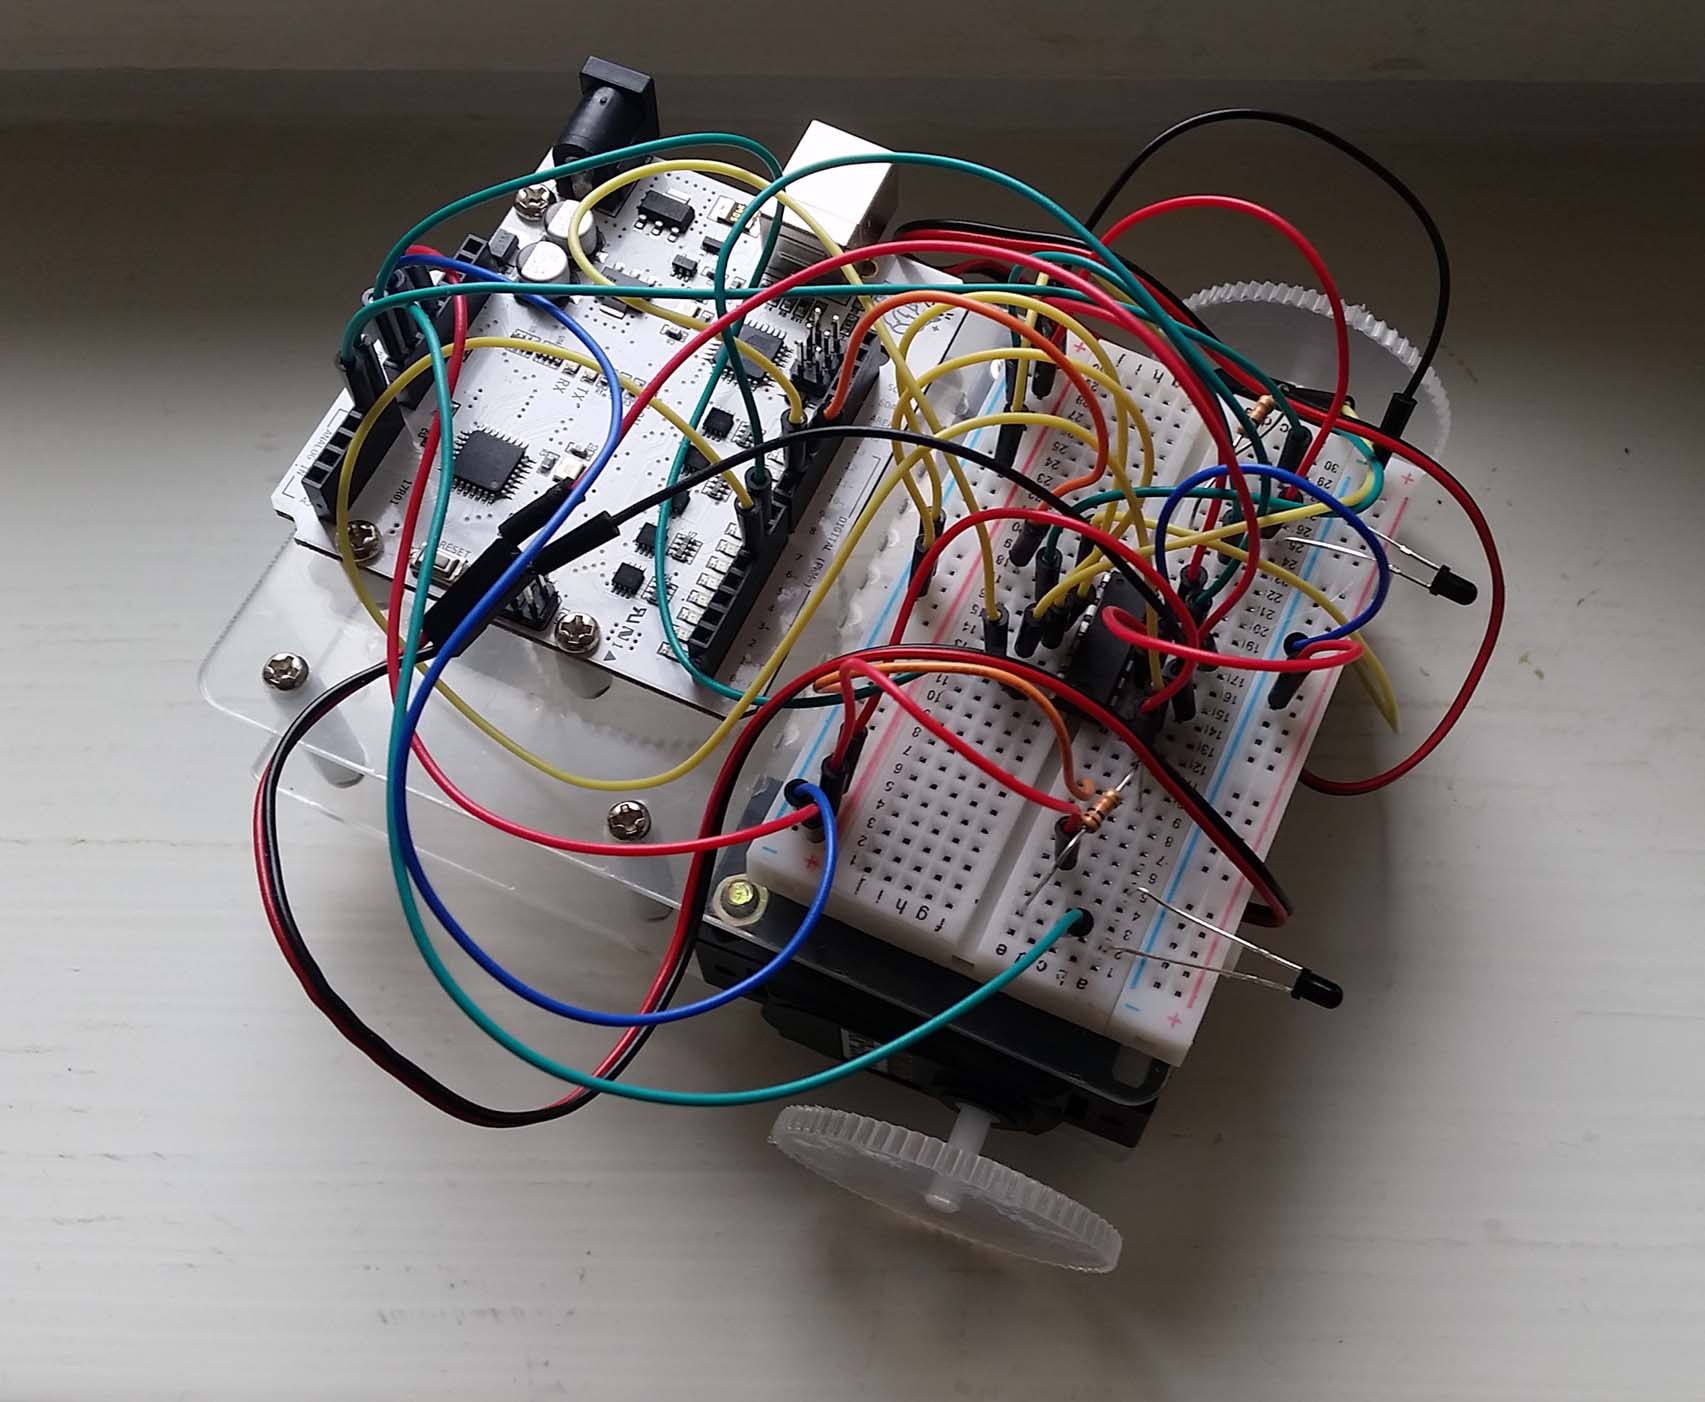 | Check instructions from the previous project: Robot on Wheels |
| Infrared or ultrasound proximity sensor |  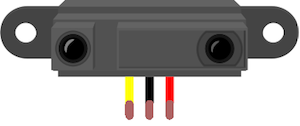 | You will have one or the other in your Maker kit. The black sensor is infrared, the blue is ultrasound |
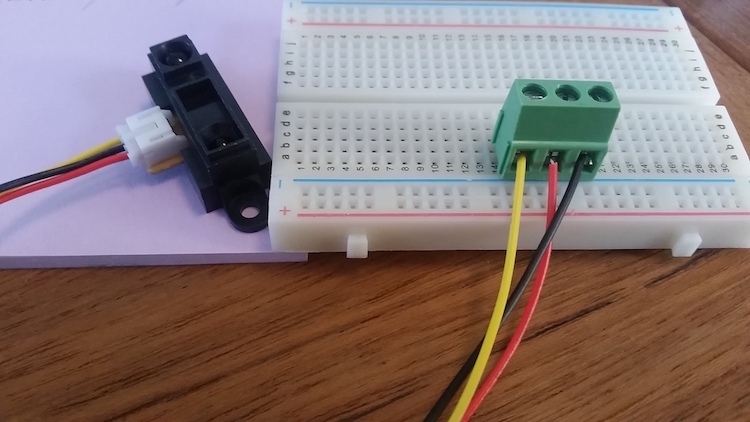
| Terminal block. | 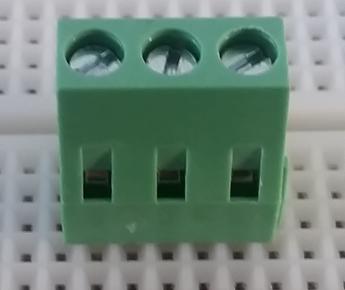 | If your maker kit has these, the infrared sensor will be easier to connect |
If you have an infrared sensor, here are some tips on how to connect it to a breadboard.
If your Maker Kit has a terminal block and a slotted screwdriver, simply screw the sensor leads into the terminal block. Make sure you connect them on the side with the bigger holes. Make sure the connection is secure by gently tugging on the connected wires. They should remain secured.
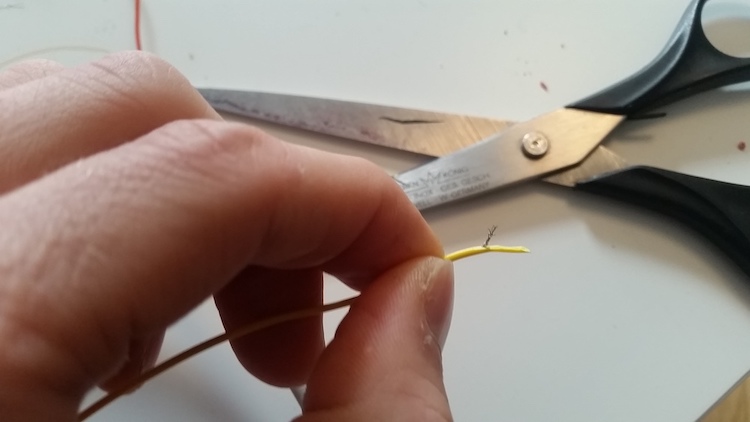
If your Maker Kit does not have a terminal block:
Use a blade of the scissors to peel the wire, so that you can bend an approximately 1 cm piece of the conductor out. Carefully roll the fibers of the conductor together between your fingertips.
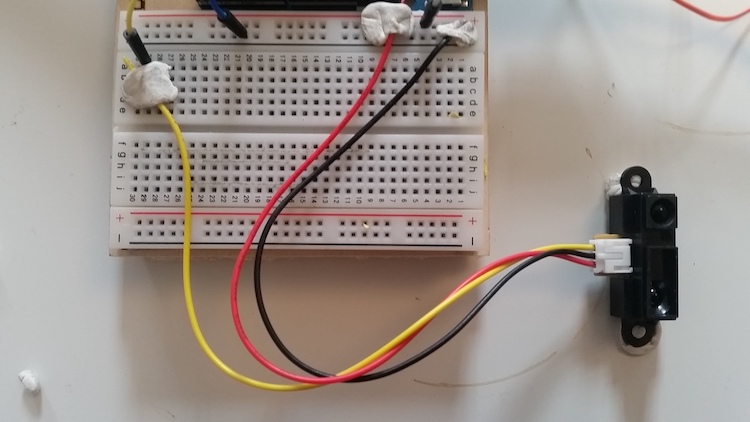
Connect the ends of the conductor to the breadboard. You can connect the black and red conductor to the horizontal rows of the board, and the yellow conductor to a vertical row. You can re-enforce the connections with Blu-Tack, like in the picture below. This way, the wires don’t come off even in rough use!
The instructions below describe connecting the distance sensor. Check the motor connection instructions from the previous project: Robot on Wheels
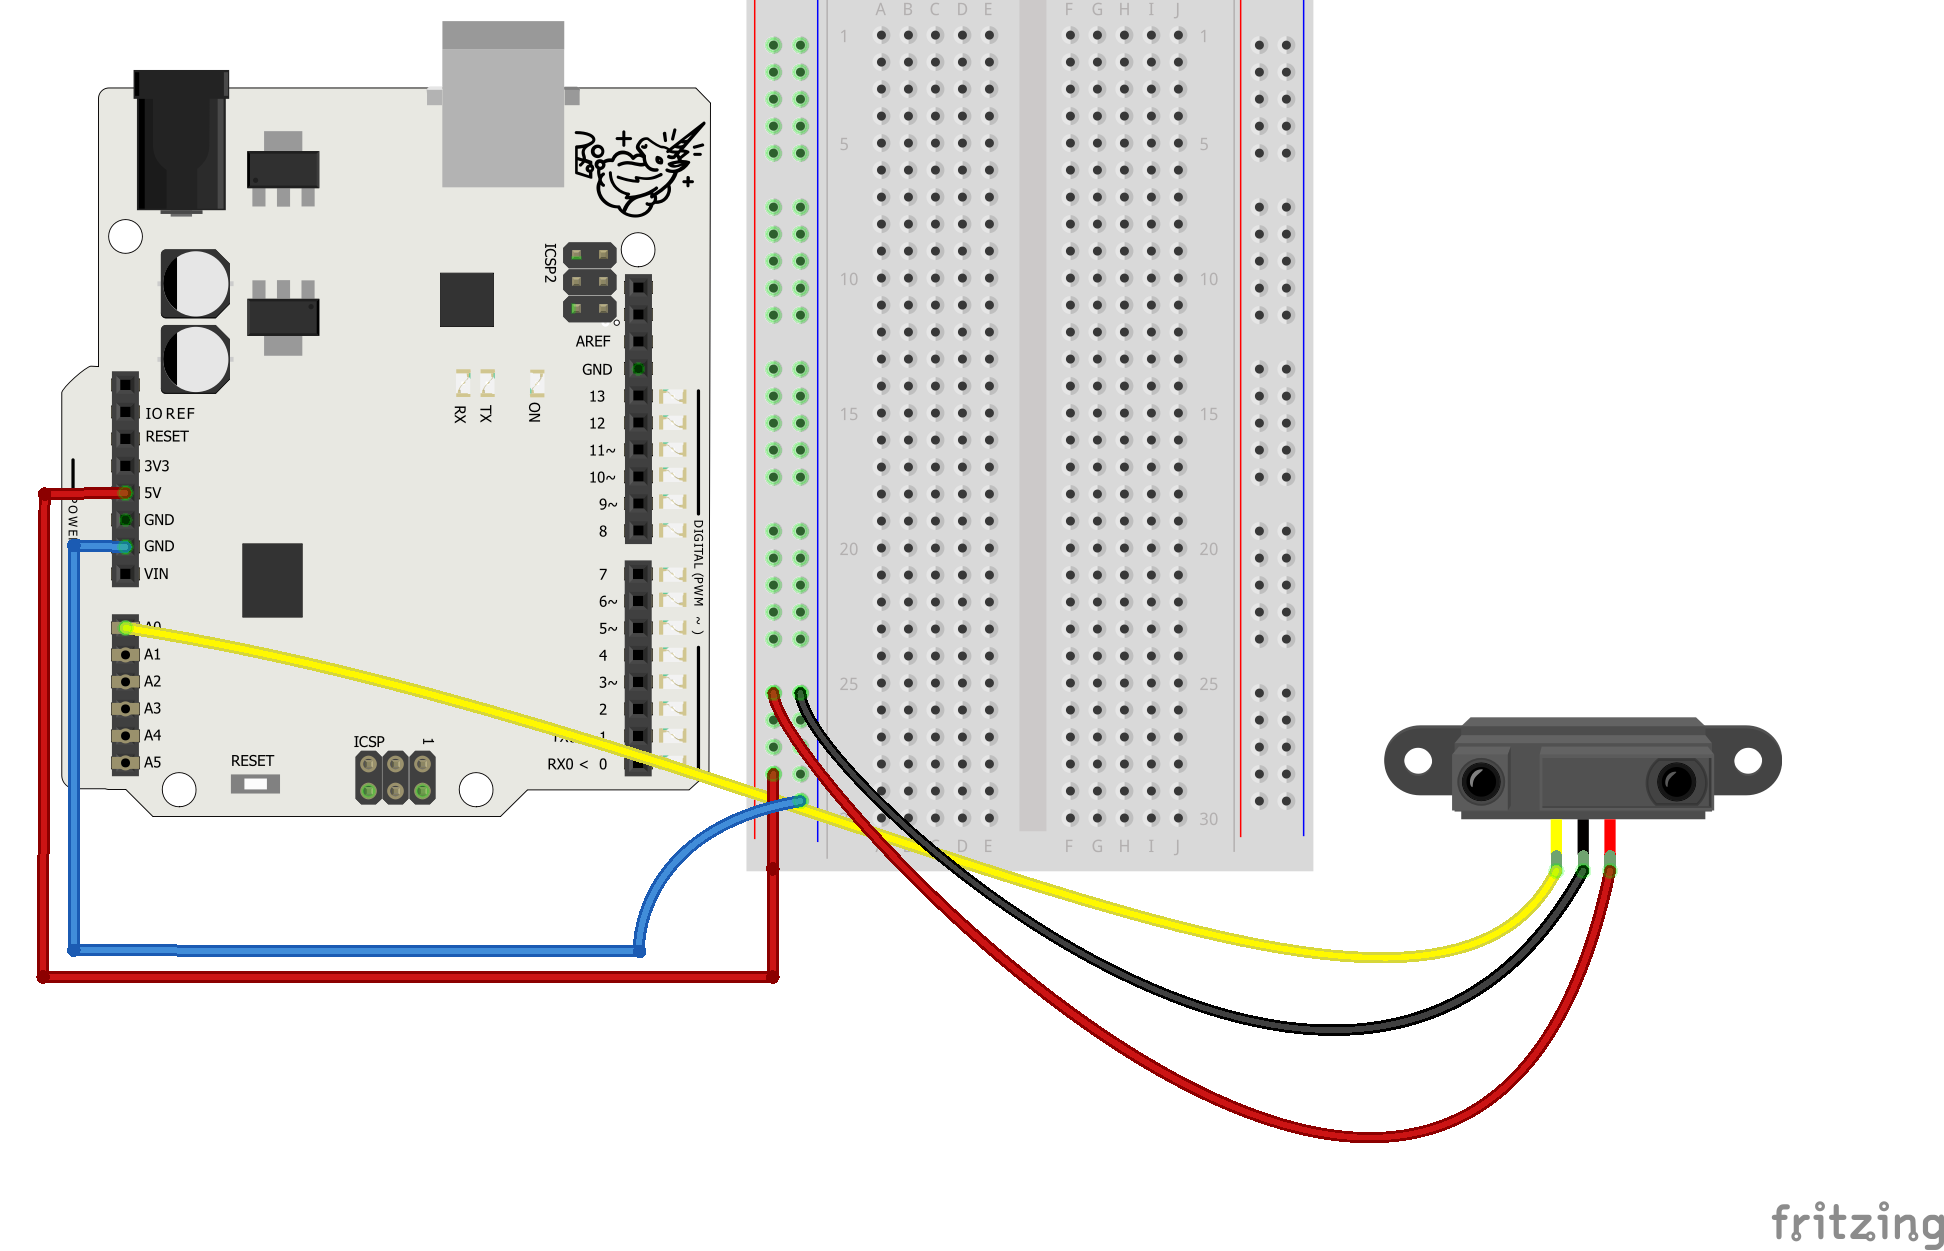
Circuit 1: Infrared sensor
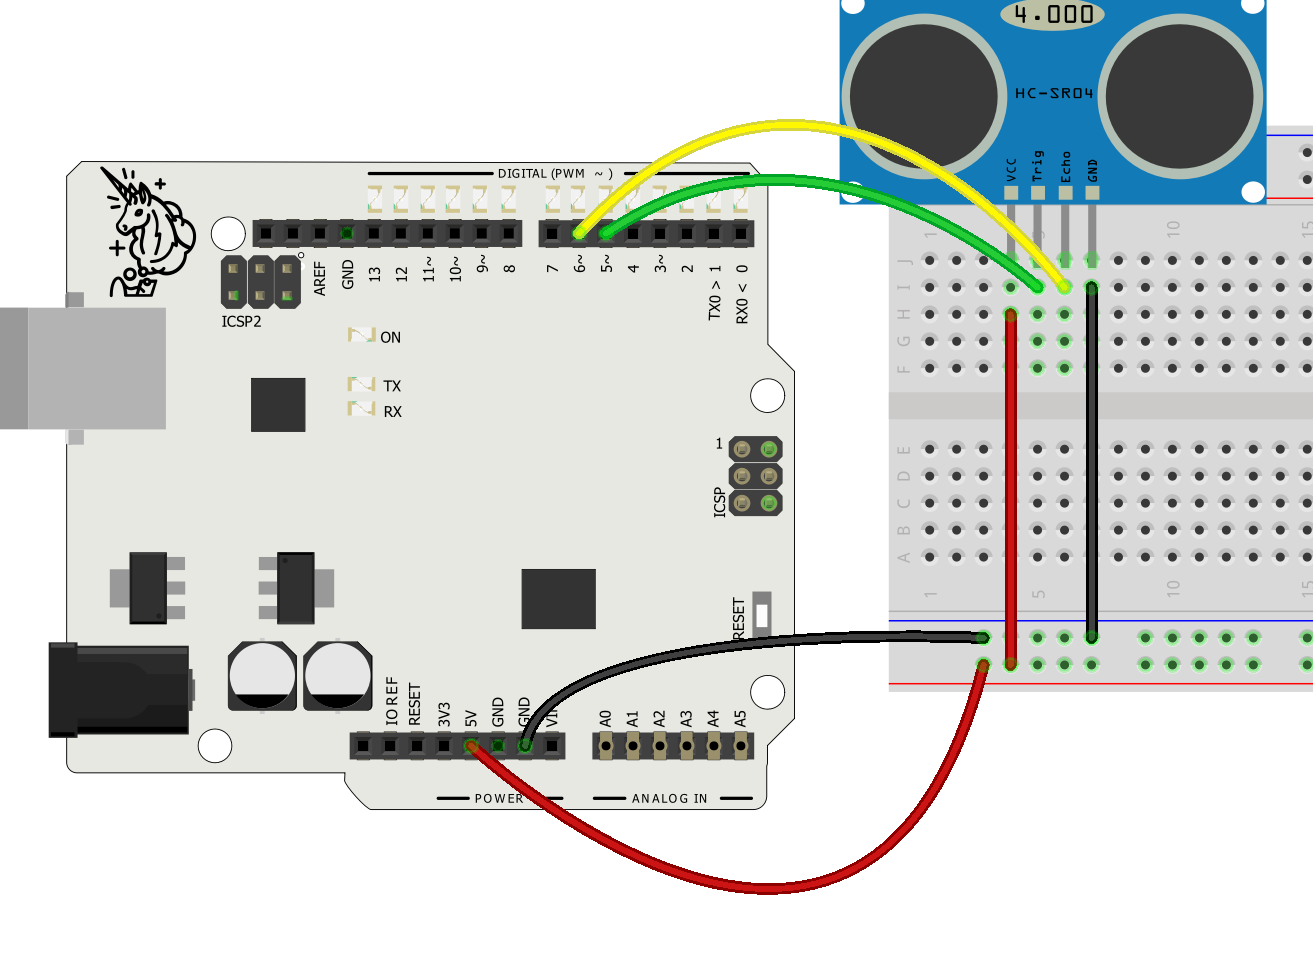
Circuit 2: Ultrasound sensor
Connect the small VCC-pin of the sensor to 5V, trig-pin to gate 5, echo-pin to gate 6 and GND-pin to ground
Make sure you don’t connect the sensor to an external power source where you connect the motors! The sensor must not be used with a voltage higher than 5v
The robot moves forward continuously. When it detects an obstacle with its proximity sensor, it randomly selects whether it goes left or right. After the turn, the robot moves forward until it detects a new obstacle.
Necessary commands:
Use the infrared sensor with the commad analogRead(gate)
To use the ultrasound sensor you will need the following commands:
If you are using an infrared sensor, use these instructions. If you have an ultrasound sensor instead, go to the next section.
With a couple of changes, the robot’s program from Robot on Wheels is a good base for the obstacle-avoiding robot as well.
First, start serial communication in setup:
 void setup() {
  // Here the needed pin initialisations
  // Start serial communication
  Serial.begin(9600);
}
Next, modify the loop section:
void loop(){
  int sensorValue = // set the value as the value from analog pin A0
  // Print sensorValue in serial monitor

  // if sensorValue is less than 400
  // choose in which direction the robot turns: action = random(3,5);
  // else
  // the robot goes forward
  if (action == 1) {
    // Put the motor controlling actions here

    delay(40); // Replace the previous delay with a short 40ms delay
    		   // This way the robot is always ready to turn
  }

  // You can remove action 2, i.e., going backwards.

  if (action == 3) {
    // Put the motor controlling actions here
  }
  if (action == 4) {
    // Put the motor controlling actions here
  }
}
If you have an ultrasound sensor, follow these instructions. With a couple of changes, the robot’s program from Robot on Wheels is a good base for the obstacle-avoiding robot as well.
int duration;
int distance:

 void setup() {
  // Here the needed pin initialisations
  // Start serial communication
  Serial.begin(9600);
}
Next, change the loop-part.
void loop(){
  //First turn the pin sending the pulse low.
  digitalWrite(5, LOW);
  delayMicroseconds(2);
   //Next send a ten microsecond pulse from pin 5
  digitalWrite(5, HIGH);
  delayMicroseconds(10);
  digitalWrite(6, LOW);

  //Save the time that the receiving pin 6 takes to detect the pulse from pin 5 to duration
  duration = pulseIn(6, HIGH);

  //Change the time in microseconds to centimeters and print it
  distance= duration*0.034/2;
  Serial.print("Distance: ");
  Serial.println(distance);

  // if distance is less than 30
  // make the robot choose a new direction action = random(3,5);
  // else
  // make the robot move forward

 if (action == 1) {
    // Put the motor controlling actions here

    delay(40); // Replace the previous delay with a short 40ms delay
    		   // This way the robot is always ready to turn
  }

  // You can remove action 2, i.e., going backwards.

  if (action == 3) {
    // Put the motor controlling actions here
  }
  if (action == 4) {
    // Put the motor controlling actions here
  }
}