How does Arduino produce sound through a piezo that's connected to one of its digital pins?
Parts
Do this
Collect these parts and get ready to make the next circuit!
In addition to these parts, you will need an Arduino UNO or Mehackit Board, a USB cable, a breadboard and a bunch of
jumper wires.
Part
Image
Description
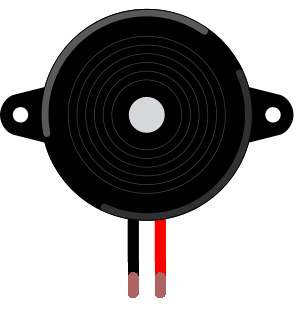
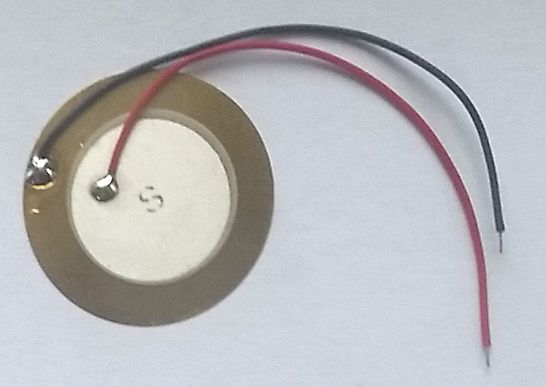
Piezo speaker
Piezo speakers may look different, here's two examples.
A piezo can transform a quickly alternating voltage into sound. Some piezos can be used as a knock
sensor. You will need a so-called passive piezo for this chapter. Active piezo
speakers are a bit more expensive and they are programmed differently (they also work with Arduino!)
Button
The button in the Mehackit Maker Kit is white, not brown.
There are two basic types of piezo speakers (or piezo buzzers), active and passive. In this tutorial you’ll use a passive piezo. Active piezos cost a bit more and are programmed differently. Both active and passive piezos work nicely with Arduino, but it is recommended that you use a 100 ohm resistor with an active piezo.
Passive and active piezos may look quite similar! If you have the Mehackit Maker Kit, you’ll have the passive one for sure. Some kits have both, so check out the components listing and search the model number of the piezo if necessary!
An active piezo has built-in components that produce sound immediately when you activate the piezo with a direct current (DC). You can use the digitalWrite command to play sounds. However, to control the pitch of the sound you have to manipulate the speed at which the piezo pin is turned on and off.
As you will learn, the tone command is an easy way to make sounds with a passive piezo!
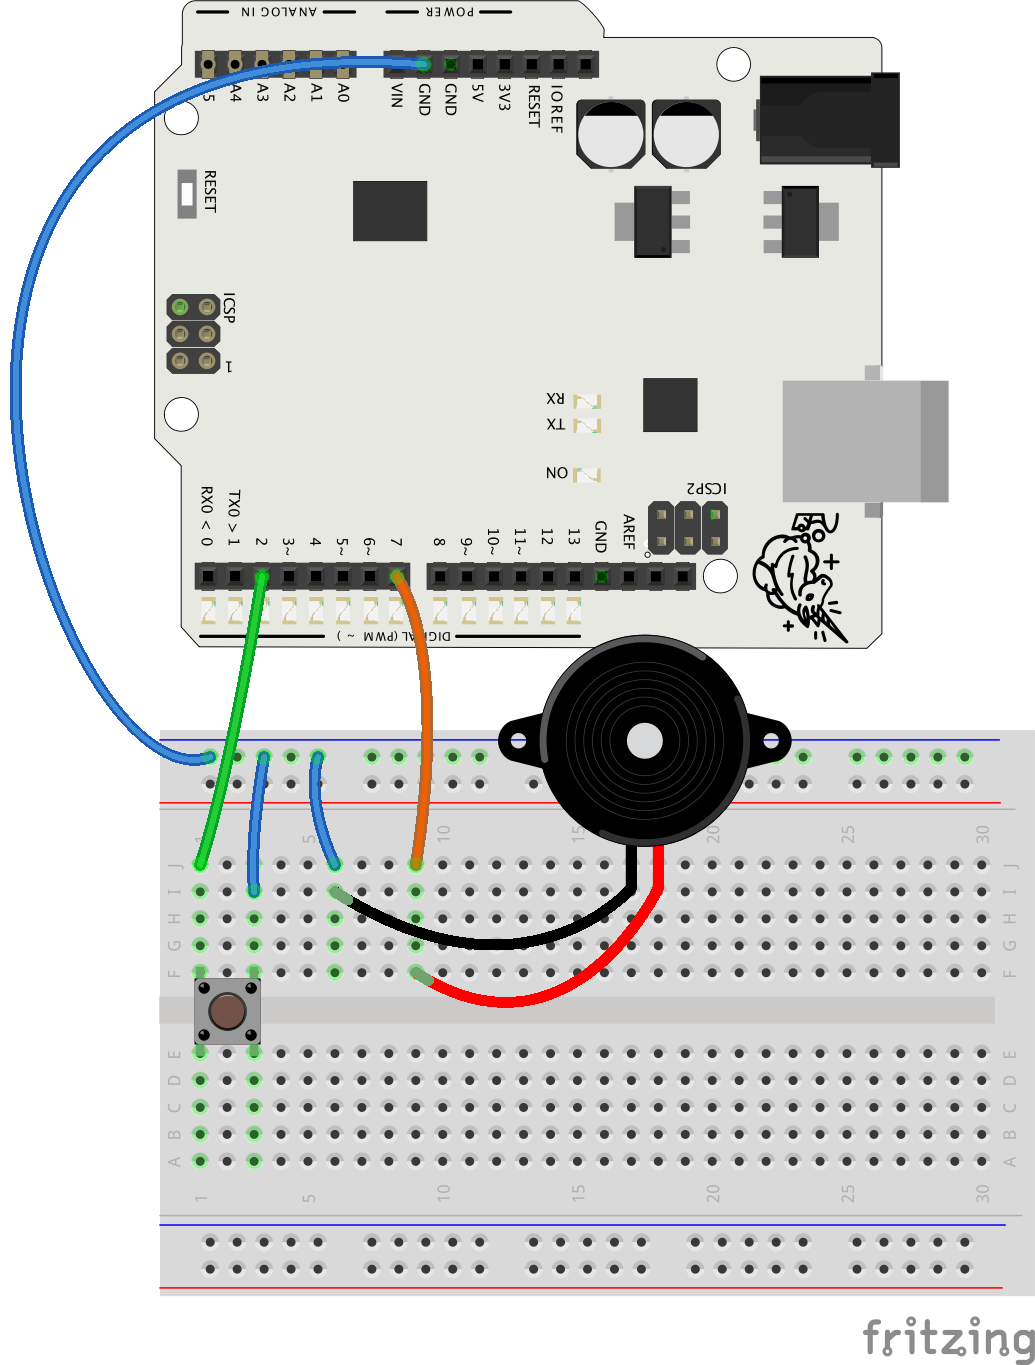
Circuit
Do this
Make a circuit according to the diagram below.
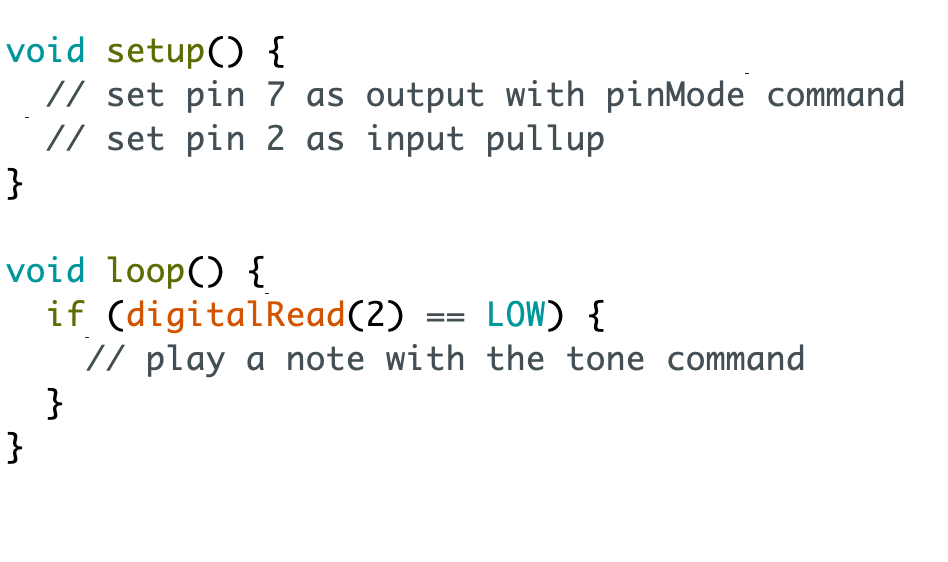
Connect the pushbutton to pin 2 and ground (GND)
Connect the piezo to pin 7 and ground
Here's how you connect a piezo that has pins instead of wires:
Continue your doorbell: follow the instructions in the example below.
You can write comments first and then your own code under them, like
this:
OR you can leave the comments out.
Check the video again if you don't remember how to write the
missing commands.
Code example
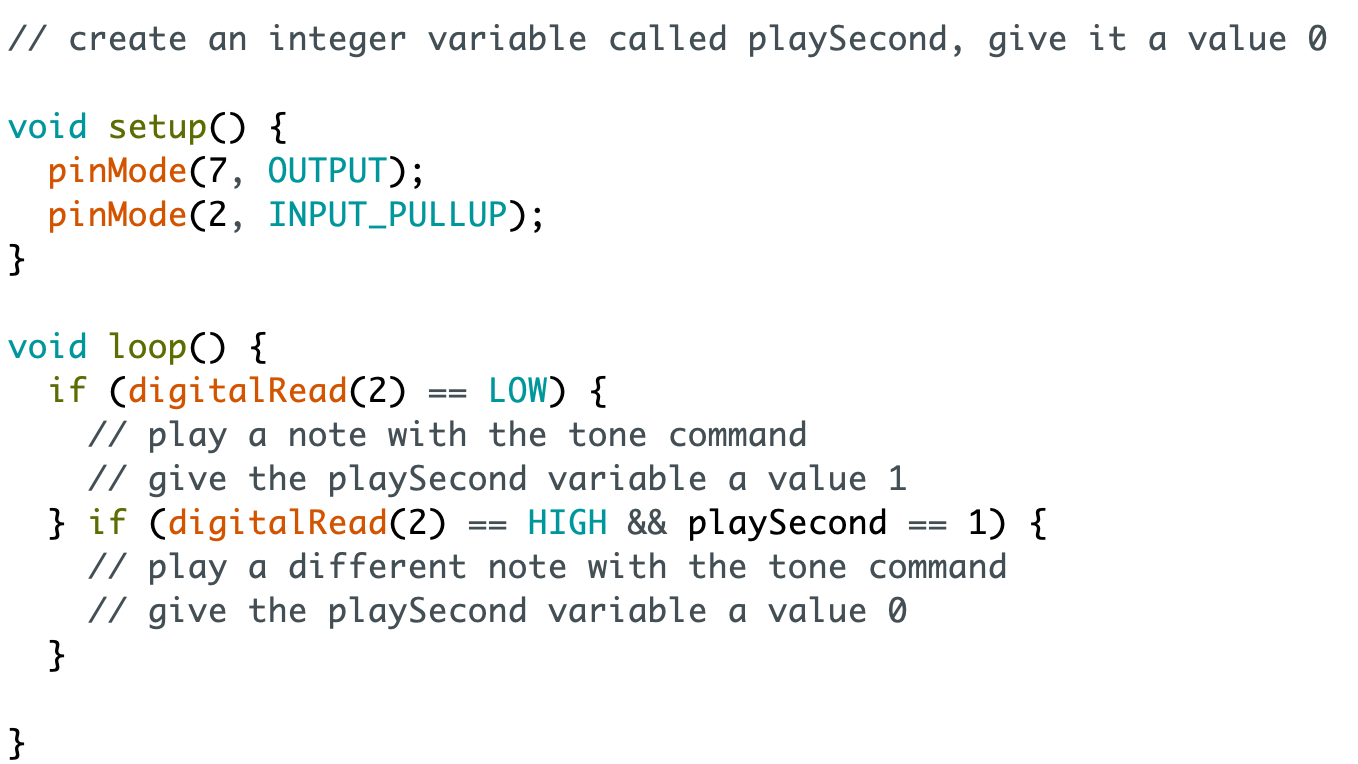
EXTRA
Add new tone commands with different notes inside the if
statements
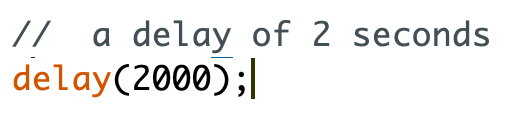
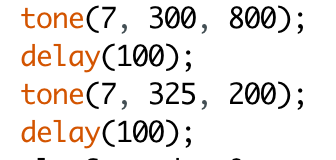
Insert a delay command between notes so you can hear them! Change
the delay values to create rhythms:
Check out this table of
notes if
you want to use certain notes! Pick the number after a note name and
give it to the tone command as the second argument.
You wrote int in the beginning of your code. What does it mean?
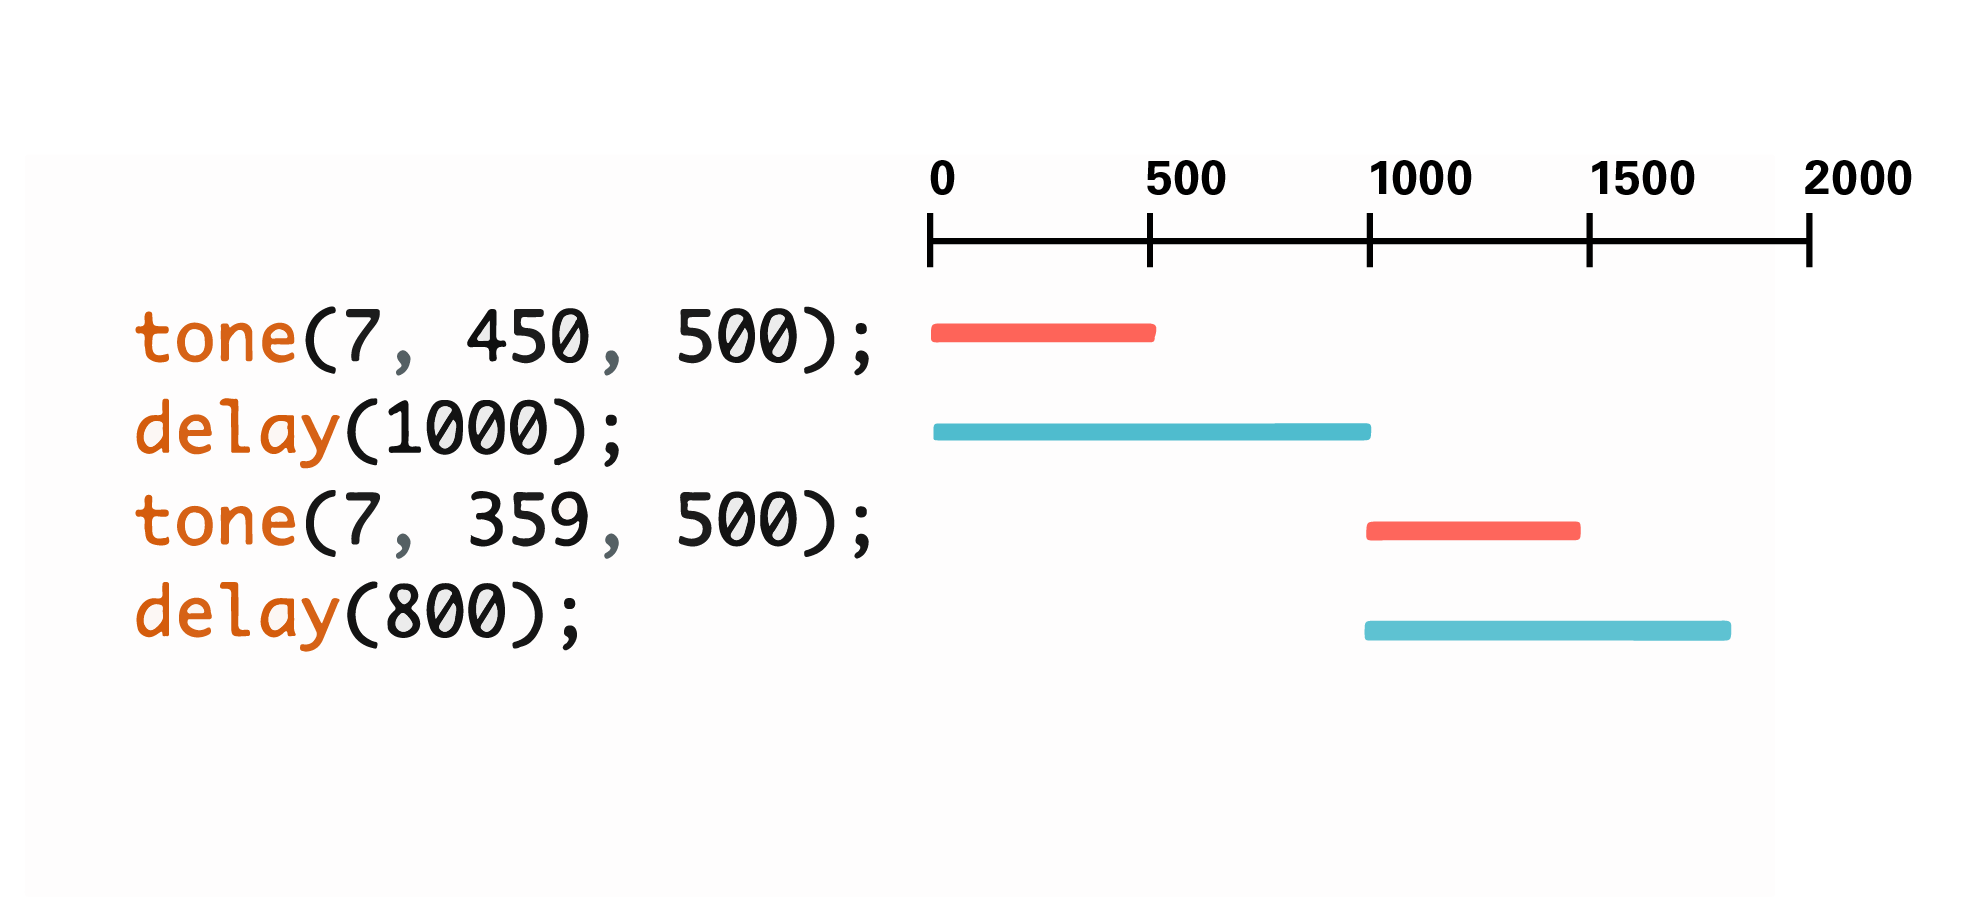
It is not required to understand just yet how Arduino sets the timing
of tone and delay commands, but the students may wonder how their
Arduino rhythms are realized and what the logic is behind the code.
Arduino has built-in timers for keeping track of timed events. These
include playing a note, counting how long a delay is or what kind of
electric pulses must be fed to a motor.
In the example above, the length of the note is 500ms, and there are
delays of 1000ms and 800ms written after each tone command. But how
long does it take to play through the whole thing?
Instead of first playing a note for 500ms and then having a break of
1000ms, then playing the second note and executing the second delay,
Arduino times the events a bit differently:
The first tone starts simultaneously with the first delay command,
and likewise, the second tone and second delay start at the same
time.
This is due to how Arduino's timers work: tone uses a different timer
than delay! But remember, delay affects the whole program meaning
that no new commands can be executed while a delay is "on".
&& (double ampersand) is one of the logical (or boolean) operators
used in programming. It is also called logical or boolean AND. As
described, it is typically used in an if statement with two conditions
that are simultaneously true.
In addition to AND, there are other logical operators, as well.
Imagine a button connected to both pin 2 and pin 3 - in this case, the
note defined in the tone function will be played when either of the
buttons is pressed
! - logical NOT
Example:
if ( !(digitalRead(2) == LOW)) {

    tone(7, 440, 80);
}
Now the tone is played if the button in pin 2 does not produce the
reading LOW. This particular example could be written differently - it
is the same as:
if ( digitalRead(2) == HIGH) {

    tone(7, 440, 80);
}
Logical NOT is a quick and practical way to invert a program's logic in
many cases.