It's a Switch

Educator notes

Educator intro

Transcript

Hi! I'm Antti from Mehackit. Switches like pushbuttons are the simplest components for creating interaction with Arduino. Now you'll learn how to control things with simple on-off logic. Press a button and LED lights up, don't press a button and the lights out and so on. You'll learn how to connect switches to an Arduino, how to read switches by programming and how to program conditions with the if statement. You'll also use variables for the first time in this module. Variables will be needed here for storing the current status of the program. To keep things interesting I'll introduce a new output component: the piezo speaker. It might be a bit noisy and annoying at times but students usually like making sounds with Arduino. You'll learn a thing or two about programming sounds in this chapter, too. The final exercise has two options. Making your own switches from scratch is a fun and creative task. It can lead to great ideas for future projects. I suggest you at least take a look at those exercise instructions because being able to make your own switches can be useful in many kinds of projects later on. The other exercise option is a reaction game which makes use of ready-made code. It's a common practice to use code examples, software libraries and similar pieces of shared code as a basis for new programs. It's good to get used to looking for familiar bits of code in a slightly more advanced code example. And yeah, it's pretty fun to make your own game even if your Arduino skills are still a bit limited. Have fun and encourage the students to work together. If they work in teams they should swap roles every now and then so everybody gets to try out coding and making circuits.

Length of the chapter: 1,5 - 3h

Adjust the length of the chapter according to the time you have at hand.

  • 1,5 hours: allow 15-20 minutes to accomplish one of the final exercises.
  • 1,5-3 hours: let the students make both final exercises, while allowing the more time to fine-tuning their mini projects.

Learning Objectives

Students learn…

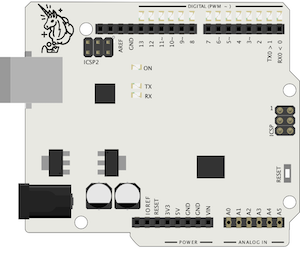
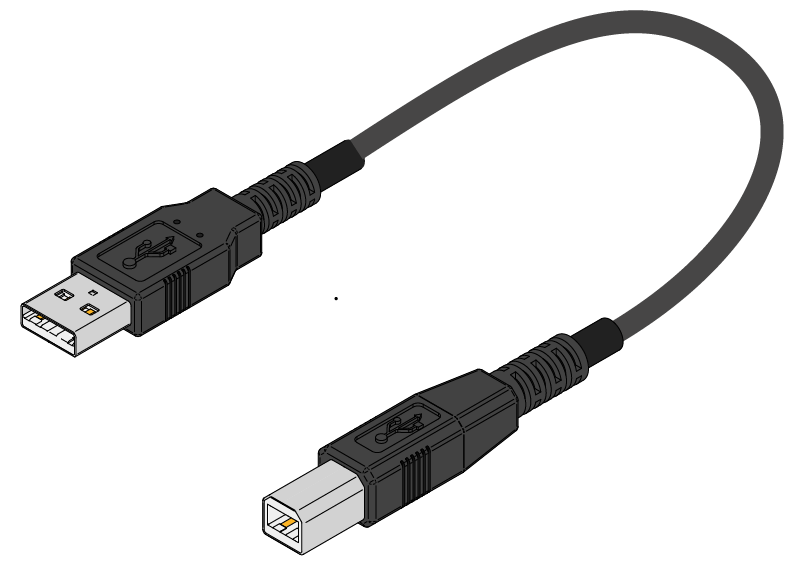
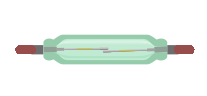
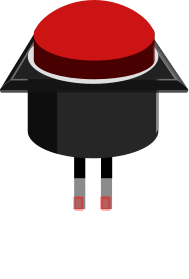
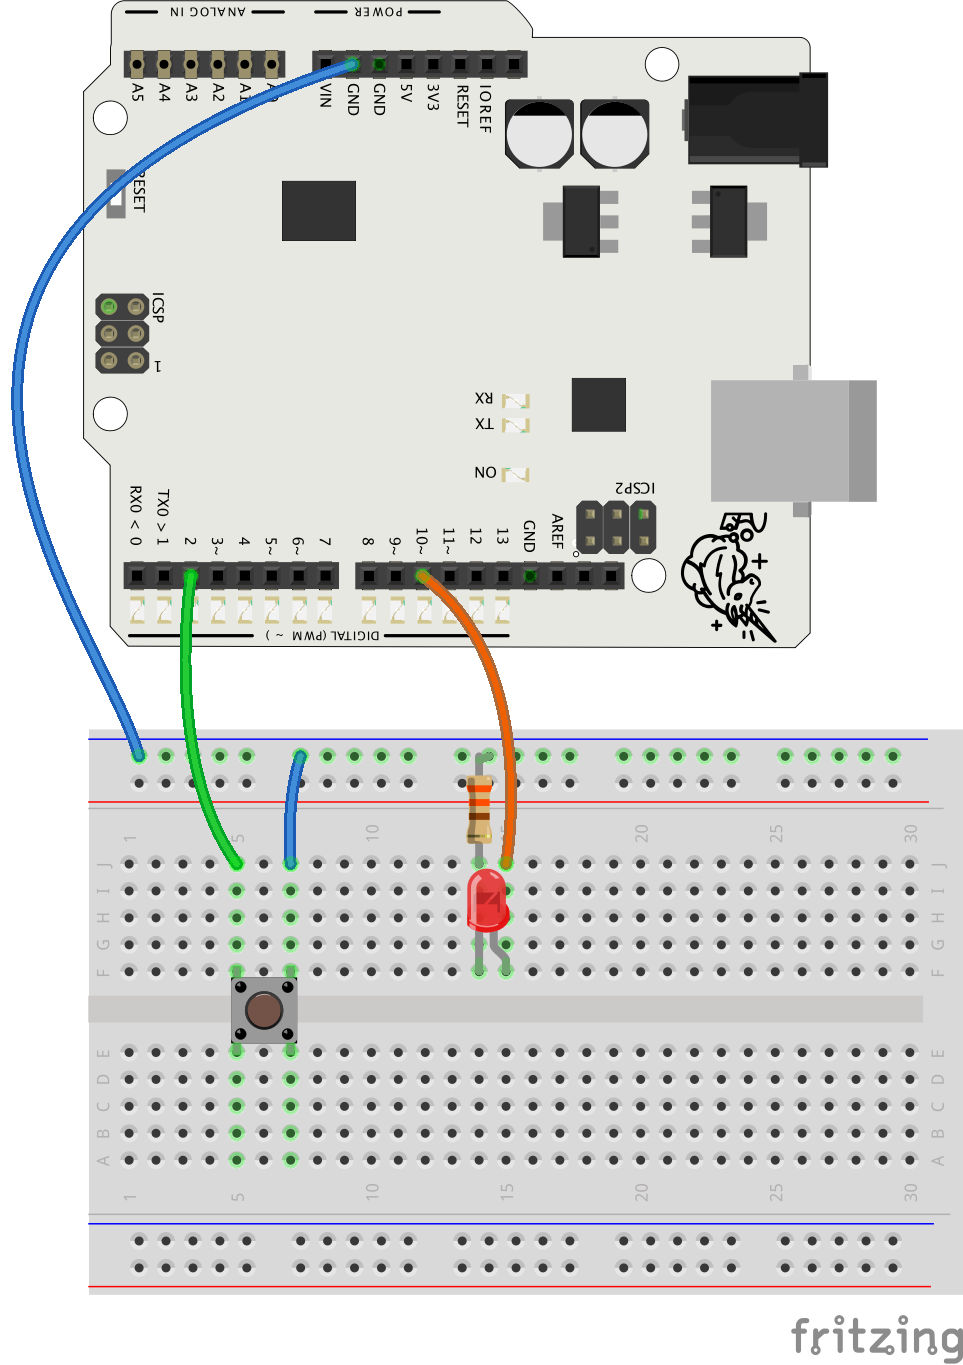
  • … to connect different switches to digital pins
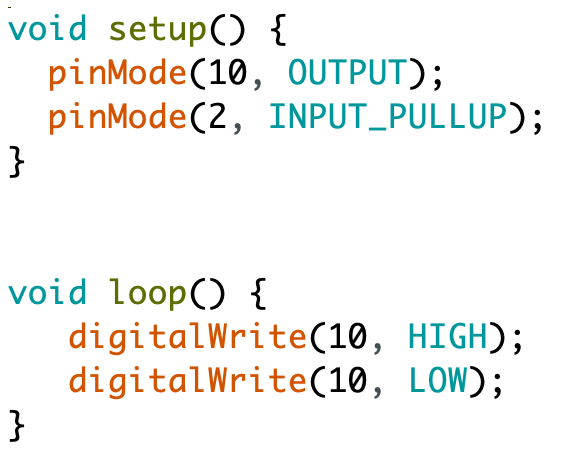
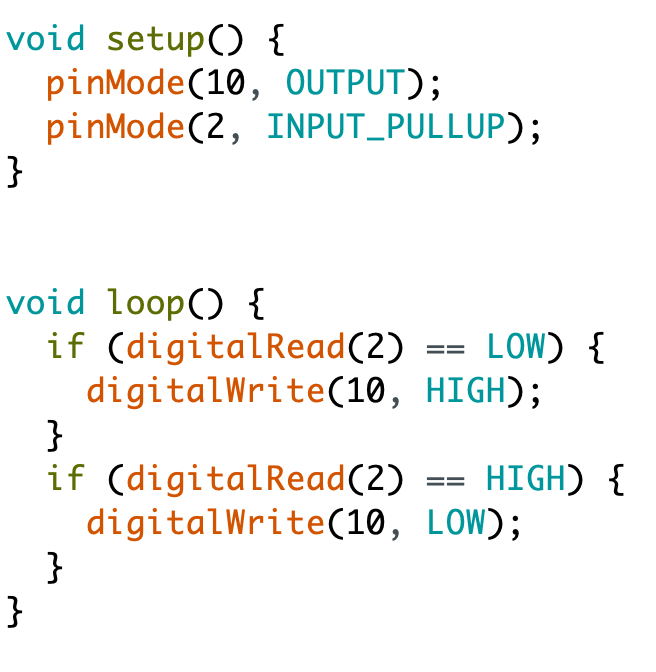
  • … to make switches work by programming: to set the pin mode to INPUT_PULLUP, to read the status of the switch with digitalRead(pin);
  • … to program conditions with if statements, also using multiple conditions
  • … about variables: how to create a variable, how to give it a value, how to use a variable to store the status of the program
  • … to make sounds using a piezo speaker and the tone function

Depending on the final exercise, students also practice…

  • …combining inventing and crafting skills that work with Arduino Exercise 1: Your Own Switch Check out the exercise instructions and get some crafting materials (cardboard, tin foil, paper glue, scissors, tape) ready if your students choose this exercise.
  • …using multiple buttons with Arduino, utilizing ready-made code to make a more advanced project and to learn different possibilities Exercise 2: Reaction Game

Slides and Lesson Plans

Feel free to use these slides to introduce the second chapter to the students!


Plan 1 - Structured Lesson (90-125 min)

TimeWhat?
5-10 minMake sure everyone has the electronics components they need.
SCRUM routine: Students explain to others: 1) what was the last thing they did on the previous lesson and 2) if they had any challenges they need help with. If students are shy to speak when others are listening, you can go and talk with them individually later on.
5-10 minIntroduce the second chapter with the slides above. 
It's fine if some students are still doing tasks from the first chapter. Introduce the second chapter to everyone and help out the ones who are not there yet, afterwards
20-30 minStudents go through the part It's a Switch.
Go around in the classroom while the students are working and discuss briefly with each student. Talk especially with those who have had challenges or seem to lack motivation. Make sure that every student has some kind of a meaningful goal for this lesson. 
5-10 min

Ask the students if they have had any challenges so far.
If needed, copy the code from Educator Notes, show it on a big screen and discuss with the students how if statements work. 
If the students have different switches available for experimenting, discuss their findings, too.

20-30 minStudents continue with the material and go through the section Doorbell. Encourage the students to speak out if they have challenges.
10 min

Reflection discussion: What has been the most interesting part? Do you have ideas of what you could make with these components and programming? 

Introduction to the exercises
- Give a time limit: eg. 20 minutes!

20 min

Students choose and work on an exercise: 
1) Make Your Own Switch
2) Reaction Game

5 min

You can end the lesson (or start the next one) with a few student projects - volunteers can present what they have created.


Plan 2 - Free-form lesson (90-140 min)

TimeWhat?
5-10min

Make sure everyone has the electronics components they need.
SCRUM routine: Students explain to others: 1) what was the last thing they did on the previous lesson and 2) if they had any challenges they need help with. If students are shy to speak when others are listening, you can go and talk with them individually later on.

5 min

Set a goal for the second (and third) lesson: complete the second chapter. Show the exercise options (Make Your Own Switch / Reaction Game) of the chapter to the students on a screen.

Instruct the students to start from the section It's a Switch and move on at their own pace. Encourage the students to speak out if they have questions.

50-90 min

Go around in the classroom while the students are working and discuss briefly with each student. Talk especially with those who have had challenges or seem to lack motivation. Make sure that every student has some kind of a meaningful goal for this lesson. 

If you feel that students have trouble understanding if statements or variables, use the code examples in the Educator Notes section and discuss these topics with the whole group. Let the students be active instructors for each other, to build a collaborative atmosphere. 

5-10 min

Reflection discussion: What has been the most interesting part? Do you have ideas of what you could make with these components and programming? 

Introduction to the exercises
- Give a time limit: eg. 20 minutes!

20 min

Students choose and work on an exercise:
1) Make Your Own Switch
2) Reaction Game

5 min

You can end the lesson (or start the next one) with a few student projects - volunteers can present what they have created.

Introduction


What is a switch?

Parts


Do this

Collect these parts and get ready to make the next circuit!

PartImageDescription
Mehackit Board or Arduino UNOA minicomputer you can program to control light, sound and motors. Connect sensors or switches to make interactive devices.
USB cable (A/B)You upload the program you have written on the computer to Arduino through the USB cable. Arduino also gets power through it.
Jumper wiresYou'll need plenty of thin wires of different colors when working with Arduino!
BreadboardBreadboards are great for making temporary circuits.
LED

LEDs conduct electricity to one direction only. The longer leg is connected towards a numbered, digital pin (0-13).

Resistor 330Ω (or 220Ω)

Resistors resist the flow of an electric current.  The value of the resistor is measured in ohms (Ω). The resistance value is coded into the colored stripes (330Ω: orange, orange, brown and gold). You can replace the 330Ω resistor with a 220Ω one.

Button

The button in the Mehackit Maker Kit is white, not brown.

Pick up at least a pushbutton. If you find other switches, you can use those too! Check out these examples: 

PartImageDescription
Tilt switch 

Here's two examples of what a tilt switch might look like. You'll learn in a moment how it works!
Reed switchA reed switch may also look different - sometimes it has a black plastic casing instead of glass
Different pushbuttonsYou can connect all kinds of buttons to Arduino. If you use buttons from discarded electronic devices, you may need crocodile clips or other kinds of extension wires to connect them. 
Slide switchThese switches have three pins, but you only need to connect the center pin and one of the side pins to Arduino. 

Circuit


Do this

Make a circuit according to the diagram below!

Connect:

  • the long leg of the LED to pin 10 of your Arduino or Mehackit Board
  • a resistor between the short leg of the LED and the blue row at the side of the breadboard
  • a long row on the side of the breadboard to any GND pin
  • one side of the button on the blue row
  • the other side of the button to pin 2

What does pin 2 do in this circuit?

Educator notes

When there are several components in a circuit, you can share the ground (GND) pin with all of them. Often you need to share the 5V pin, too. This pin provides constant 5 volt voltage, which may be needed by many components at the same time (eg. potentiometers, sensors, motors) The long rows on the sides of the breadboard are meant for sharing the ground and voltage pins. 

In this chapter it is possible to connect every component to a separate GND pin, because there are three of these pins on an Arduino board. However, it is a good idea to practice using the ground and voltage rows of the breadboard - it will make the circuits easier to understand and debug.

Not all breadboards have color coded side rows. But when they do, students sometimes connect GND to a red row and 5V to a blue row. It's not dangerous. Paying attention to wire and row colors will make debugging easier later on as circuits become more complex.

It’s generally not a good idea to use pins 0 and 1 in circuits: they are reserved for serial communication between the board and computer, which means they will not work as reliable input or output pins in many cases.


Programming 1: Setting Things up

Transcript

I'll start writing a program that turns the light on when a button is pressed. First I'll tell the board which pins I'm using and what for. The section I'm working with first is setup. There's an LED on pin 10 and a button on pin 2, and I need a pinMode command for both of them. You already know how to set up the LED. pinMode, pin 10 and OUTPUT. Remember these slashes here, they are used when a coder wants to make comments inside the code. It's just notes and text that the Arduino won't even detect. The other pin, pin number 2, is not an output. It's not turning something on and off on the outside but it's bringing information in to the Arduino. This pin checks if the button is pressed. It's called an input, instead. I'm going to tell this to the Arduino by writing again: pinMode and we have here number 2 - but this time the mode is input_pullup. So why not just input, why do I have to write input_pullup? Well, there's a reason but don't worry about that just now. I'll get back to it later I promise. Let's have a look at the loop part as well. If the button is pressed, turn LED on, if the button is not pressed turn LED off. So this is what the program should do, described in normal language. I just have to replace this text with actual programming language. Turn LED on in Arduino, remember this, it's digitalWrite pin 10, and when it's HIGH then it's on. And we also remember if we want to turn the LED off I just write digitalWrite and set the pin to LOW. So now, write this part first and after that I'll show you how to write the rest of the program. You can even upload this if you want to, I mean, it's a proper Arduino program even if it doesn't do much.

Do this

Write a new program for Arduino:

Check your code by pressing the Verify-button:  

You can upload the code to Arduino, too! It just won't do much!


Where do you configure the Arduino pins you're using?

Educator notes

If at this point the students upload the program , nothing will happen. That is because the loop is repeating super fast, over and over again. So fast in fact that the LED won’t have time to react to the digitalWrite commands!

void setup() {
  pinMode(10, OUTPUT);
  pinMode(2, INPUT_PULLUP);
}

void loop() {
  digitalWrite(10, HIGH);
  digitalWrite(10, LOW);
}

Programming 2: Make the Button Work


Do this

Continue your code

  • Upload the code to Arduino
  • Test the program by pressing the pushbutton

Extra Try this if you want:

  • Change the code so that the LED lights up only when the button is not being pressed!
  • Upload the code to Arduino and test it.

Does the light turn on when you press the button and turn off when you don’t?
What is the state of pin 2 when the button is pressed down?

Educator notes

Another way to write the code could be:

void loop() {
  if (digitalRead(2) == LOW) {
    digitalWrite(10, HIGH);
  }
  else {
    digitalWrite(10, LOW);
  }
}

However, we’ve instructed the students to use two if statements, instead, in order to keep from teaching too many new things in one go.

void loop() {
  if (digitalRead(2) == LOW) {
    digitalWrite(10, HIGH);
  }
  if (digitalRead(2) == HIGH) {
    digitalWrite(10, LOW);
  }
}

There is a difference between using the if-else structure and only if statements.

  • if-else: makes sure only one of the actions defined in the structure gets executed during a loop run
  • consecutive if statements: when both if statements are true, the actions defined in both get executed during one loop run.

A button can either be pressed or not pressed - so there’s no way both if statements could be true at the same time in our code example. However, in some other program this could happen. It’s good to understand the difference: if you want only one thing out of several options to take place, choose the if-else structure. If you want to allow several options to take place, use if statements.

This will be extensively practiced, later on!


Test the Switches


Do this

If you have more than 1 switch:

Test different switches!

  • Replace the button with other switches (for example tilt and reed switches) and see how they work.
  • Hint: you will need a magnet to use a reed switch.

If you don't have any other switches than the button:

Make the LED blink when the button is being pressed!

Remember how you made an LED blink earlier? Continue your pushbutton code and make the LED blink when the button is being pressed down!

Hints:

  • You need to use the delay command and the digitalWrite command
  • These commands must go inside the curly brackets of an if statement. Which of the if statements? Find out yourself!

EXTRA

What kind of switches can you find in the room you’re in? Name at least two different switches!


Which of the following statements is true?

Learn More: Input Pullup


Want to know more?

Check out this detailed tutorial by Sparkfun!


Why do you need to define the button pin as an INPUT_PULLUP and not just INPUT?

Educator notes

The description on using pullup resistors is kept compact on purpose. If the students are new to electronics, the concept and logic of pullup resistors can be a lot to absorb. 

If you would like to teach this topic at, for example, a physics lesson, here's some extra information!

Button circuit with an external resistor: pullup explained

When you connect buttons to an Arduino, you may get the following problem:

When the button is pressed down, the pin of the button is connected to ground (GND) and the value received from the button is LOW for certain. 

When the button is released up, the value of the port floats: the value is not connected to voltage, so it can be HIGH or LOW at random. 

With Arduino, you can use an extra resistor to fix this problem. Remember, that pressing the button always connects the legs of the right and the left side of the button to each other!

When the button is not pressed, the button's input pin 2 (green wire) is connected through the resistor to voltage of 5 V (red wire). Voltage is applied to the port, and the measured value is HIGH. The value is "pulled up", hence the name pull-up resistor. 

When the button is pressed down, the button connects pin 2 and ground, and the value is LOW. In principle, pin 2 is now connected to a 5 V voltage. However, electric current always travels "the easiest way", which in this case is to ground, because that route has the least resistance!

Connecting a circuit like this to Arduino every time you use a button would be pretty time-consuming. Luckily, Arduino has a similar built-in mechanism, which you can use by defining the button pin as INPUT_PULLUP in the setup:

pinMode(2, INPUT_PULLUP);

After that the button pin is connected to the internal pullup resistor on the Arduino board. You can define any pin (0-13) as an INPUT_PULLUP pin!

Remember, that when using a button, you should always use the pullup resistor! A good memory trick for how the button behaves with the pull-up resistor is this: when the button is up, its state is up (HIGH) and when the button is down, its state is also down (LOW).

Check out this great tutorial by Sparkfun:

https://learn.sparkfun.com/tutorials/pull-up-resistors